How to convert from Single Tenant to Multi-tenant in Business Central On-Premise
Published on July 16, 2021
Dynamics 365 Business Central's multi-tenant model efficiently supports numerous customers with the same application features while keeping their data secure in separate databases. Our experts provide a comprehensive, step-by-step process to ensure our customers experience a smooth and error-free migration to this multi-tenant setup.
Single Tenant to Multi-tenant Transition Process:
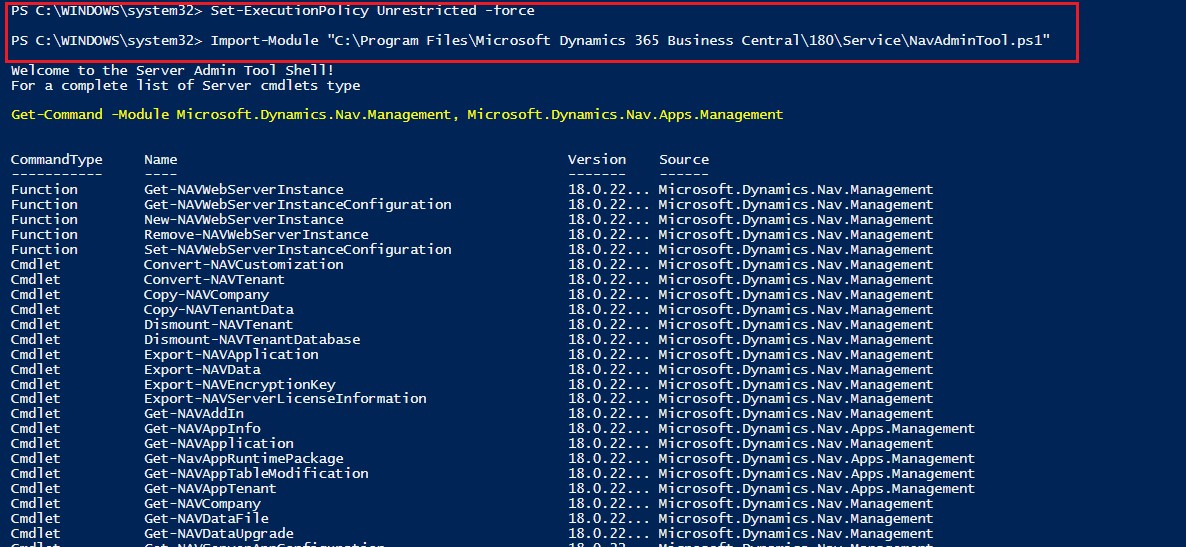
Step 1: Open the PowerShell in administrator mode and import the NAV admin tool to enable the NAV commands in PowerShell
Set-ExecutionPolicy unrestricted -Force
Import-Module ‘C:\Program Files\Microsoft Dynamics NAV\71\Service\NavAdminTool.ps1’
Step 2: Export the NAV application from the source database to the new database by using the command below
Export-NAVApplication -DatabaseServer “DatabaseServer Name” -DatabaseName “DatabaseName” -DestinationDatabaseName “DestinationDatabaseName”
Step 3: Remove the NAV application from the source database using the command below
Remove-NAVApplication -DatabaseServer “DatabaseServer” –DatabaseName “BusinessDatabaseName” -Force
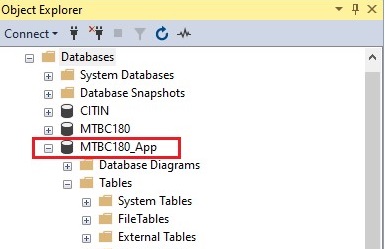
Step 4: Based on the above commands, the application database will be created in the SQL server
Step 5: Stop the server instance in the Business central administration tool
Set-NAVServerInstance Instance Name -Stop
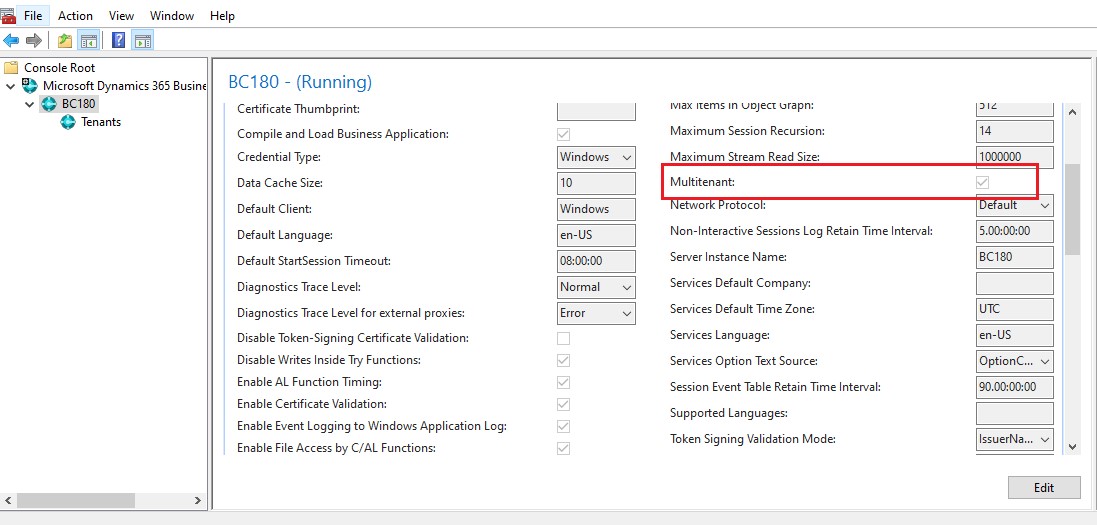
Step 6: Set the multi-tenant field in the server instance to true
Set-NAVServerConfiguration -ServerInstance InstanceName -Keyname Multi-tenant -KeyValue “True”
The above command automatically converts the single tenant server instance to a multi-tenant server instance.
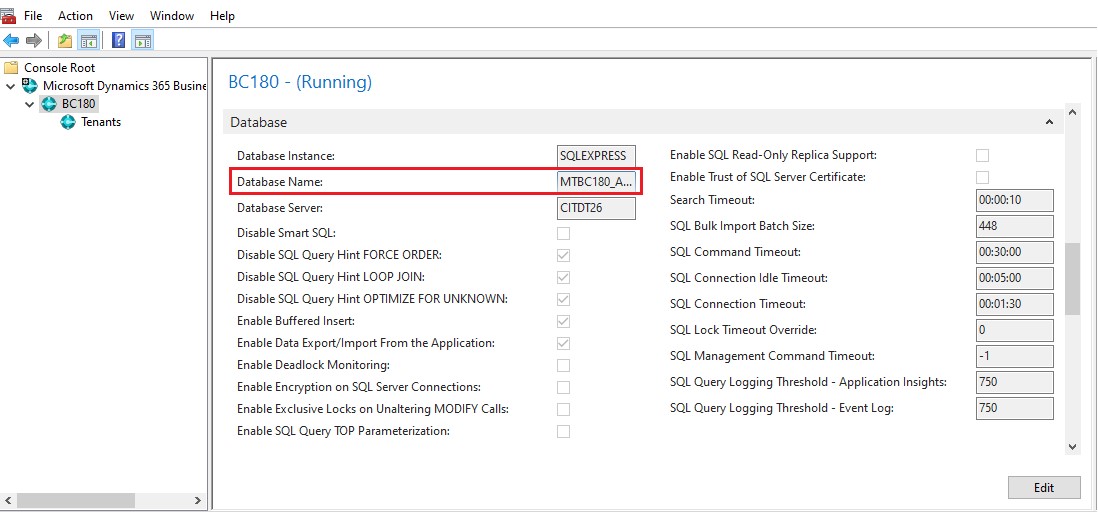
Step 7: Set the database name to blank
Set-NAVServerConfiguration -ServerInstance InstanceName -Keyname DatabaseName -KeyValue “”
Step 8: Start the server instance
Set-NAVServerInstance InstanceName -Start
Step 9: Mount the application database to server instance
Mount-NAVApplication -DatabaseServer “DatabaseServer Name” -DatabaseName Application Database -ServerInstance InstanceName
Step 10: Create the new tenant and mount the business database to the tenant
Mount-NAVTenant -ServerInstance InstanceName -Id TenantName -DatabaseName “DatabaseName” -OverWriteTenantIDInDatabase

Contact us to know more about our Dynamics 365 Business Central services.