How to integrate PowerApps portal with Dynamics 365 Business central using Power automate
Published on July 30, 2021
Need to connect your PowerApps Portal with Business Central? This step-by-step guide shows how to seamlessly integrate customer-facing portals with your ERP data. Our experts can help businesses bridge systems for better automation and user experiences removing manual data entry or siloed information. Contact us to know more about our Dynamics 365 Business Central services.
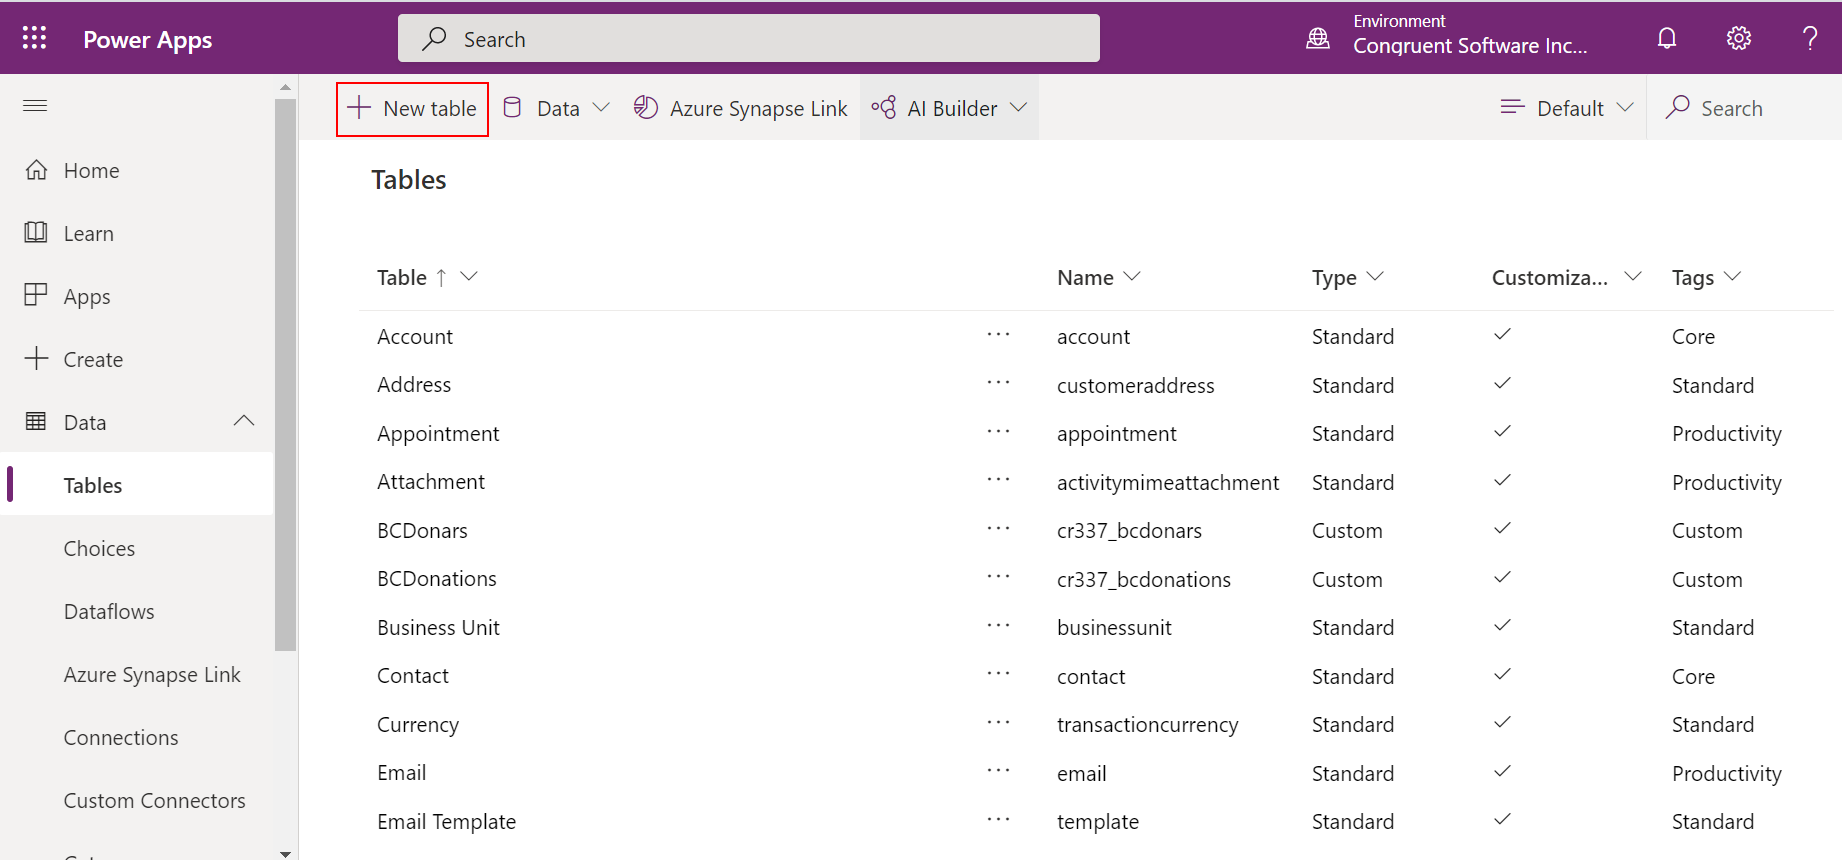
STEP 1: Log into the Microsoft platform and select PowerApps. To create a portal, generate a table in PowerApps. Select the data action from the left pane of the window. Now, click on the tables, to create a schema for the portal

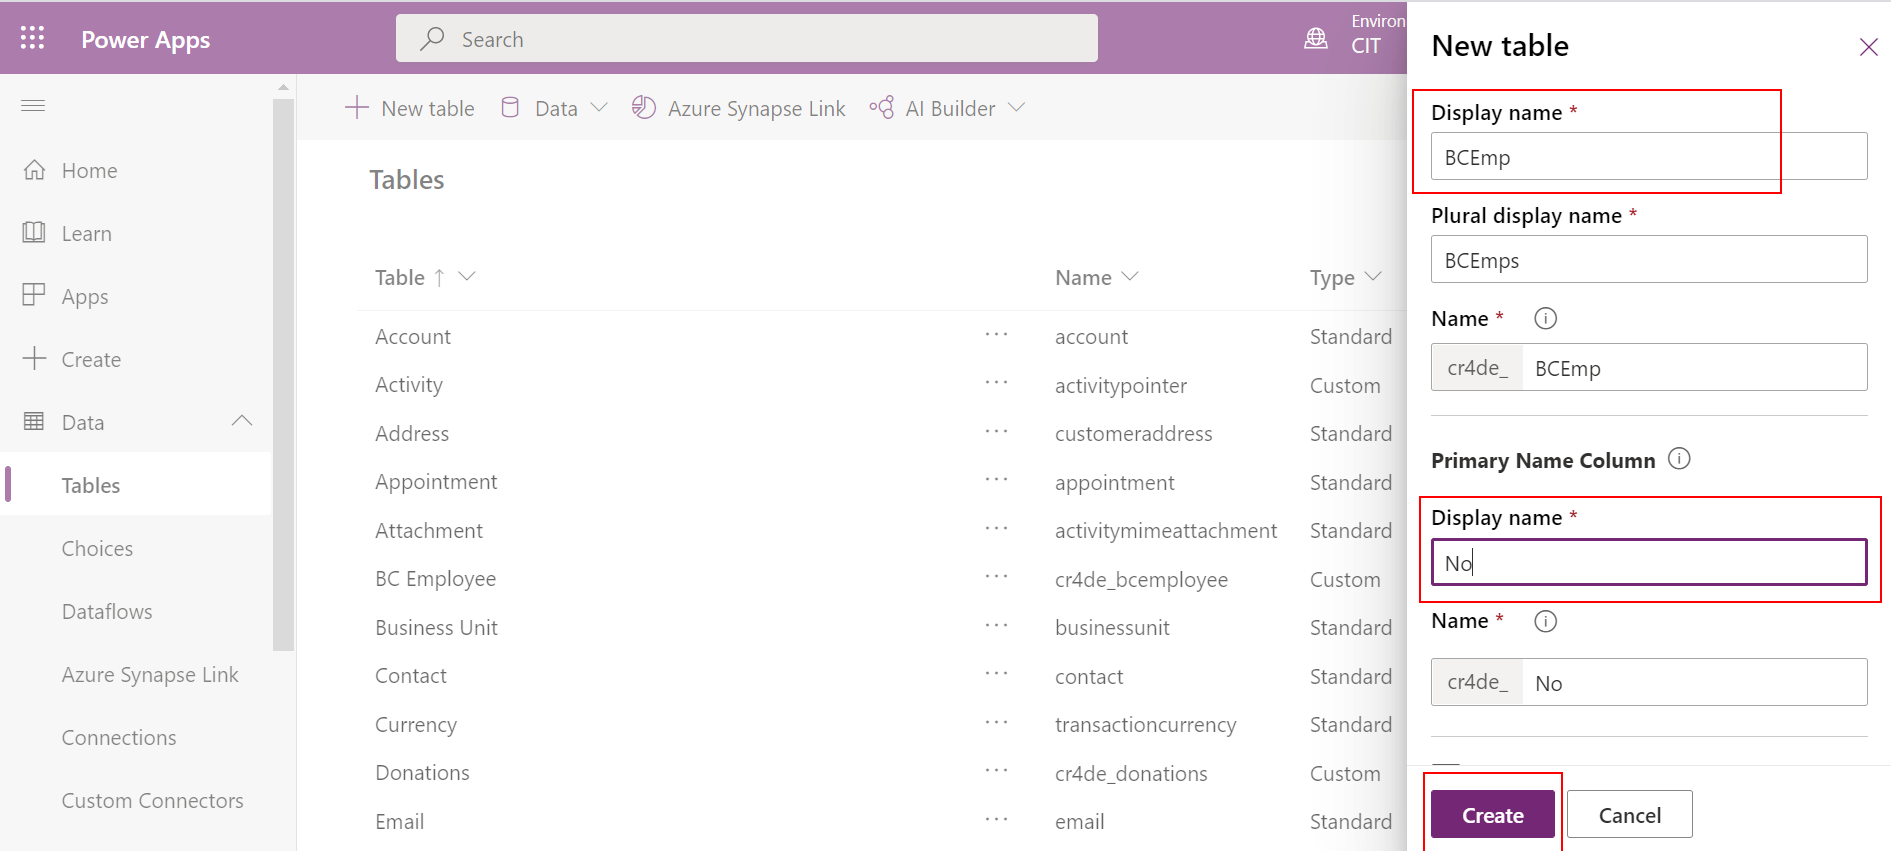
STEP 2: Click new tables from the top action ribbon. Enter table details such as table name and primary column and click Create
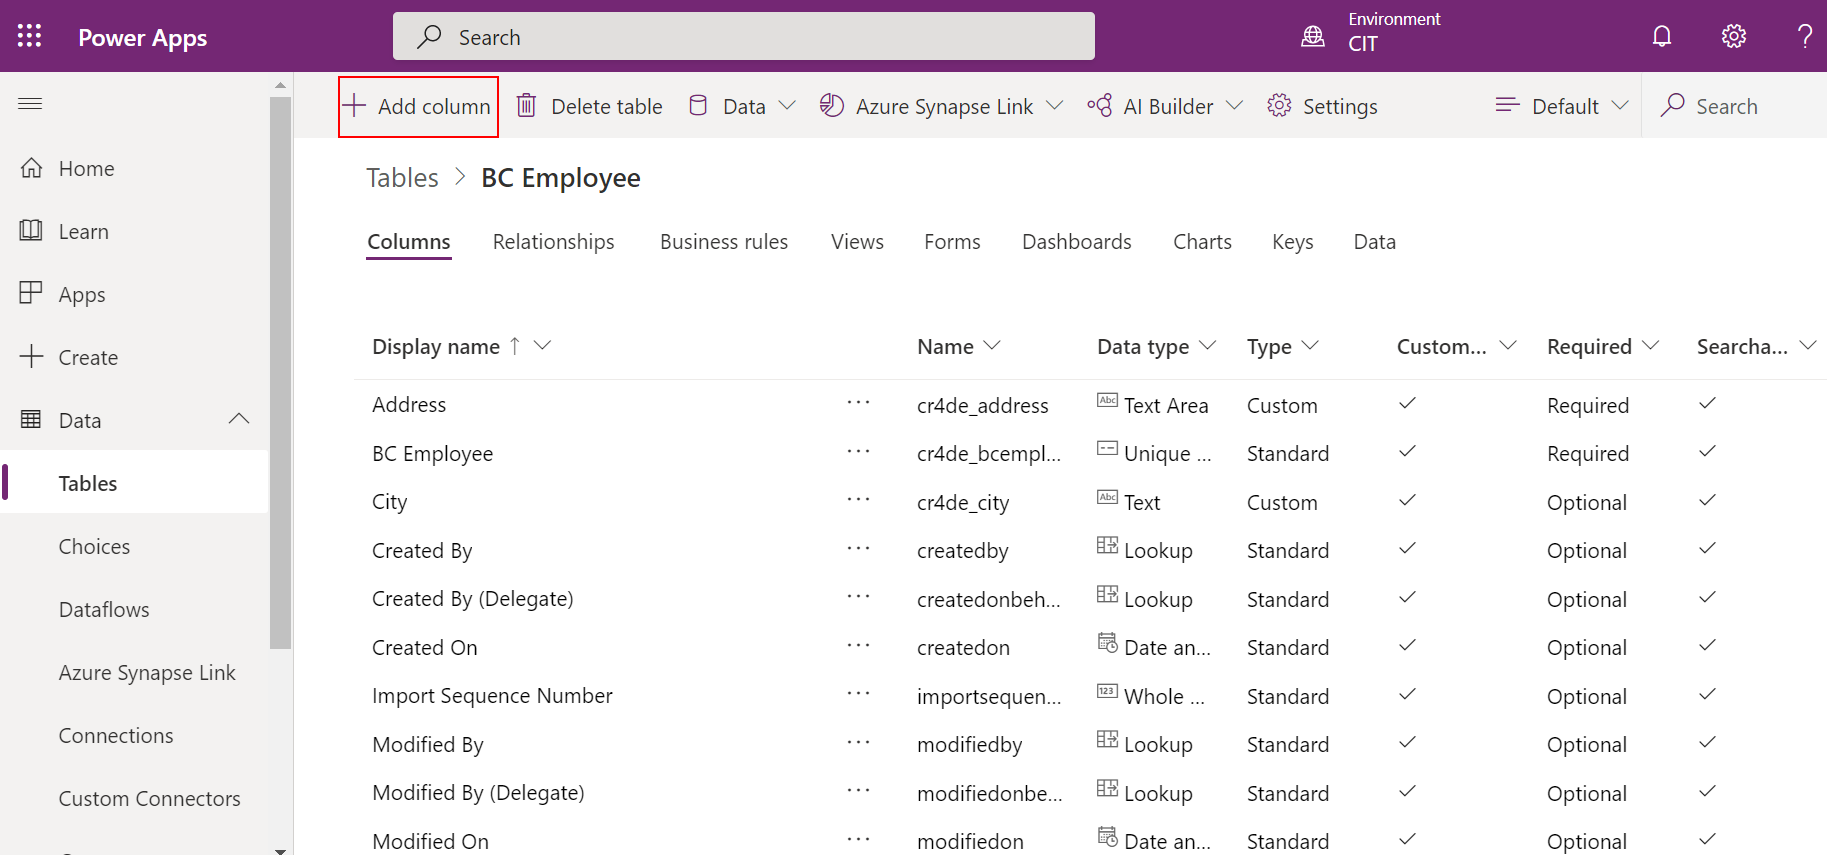
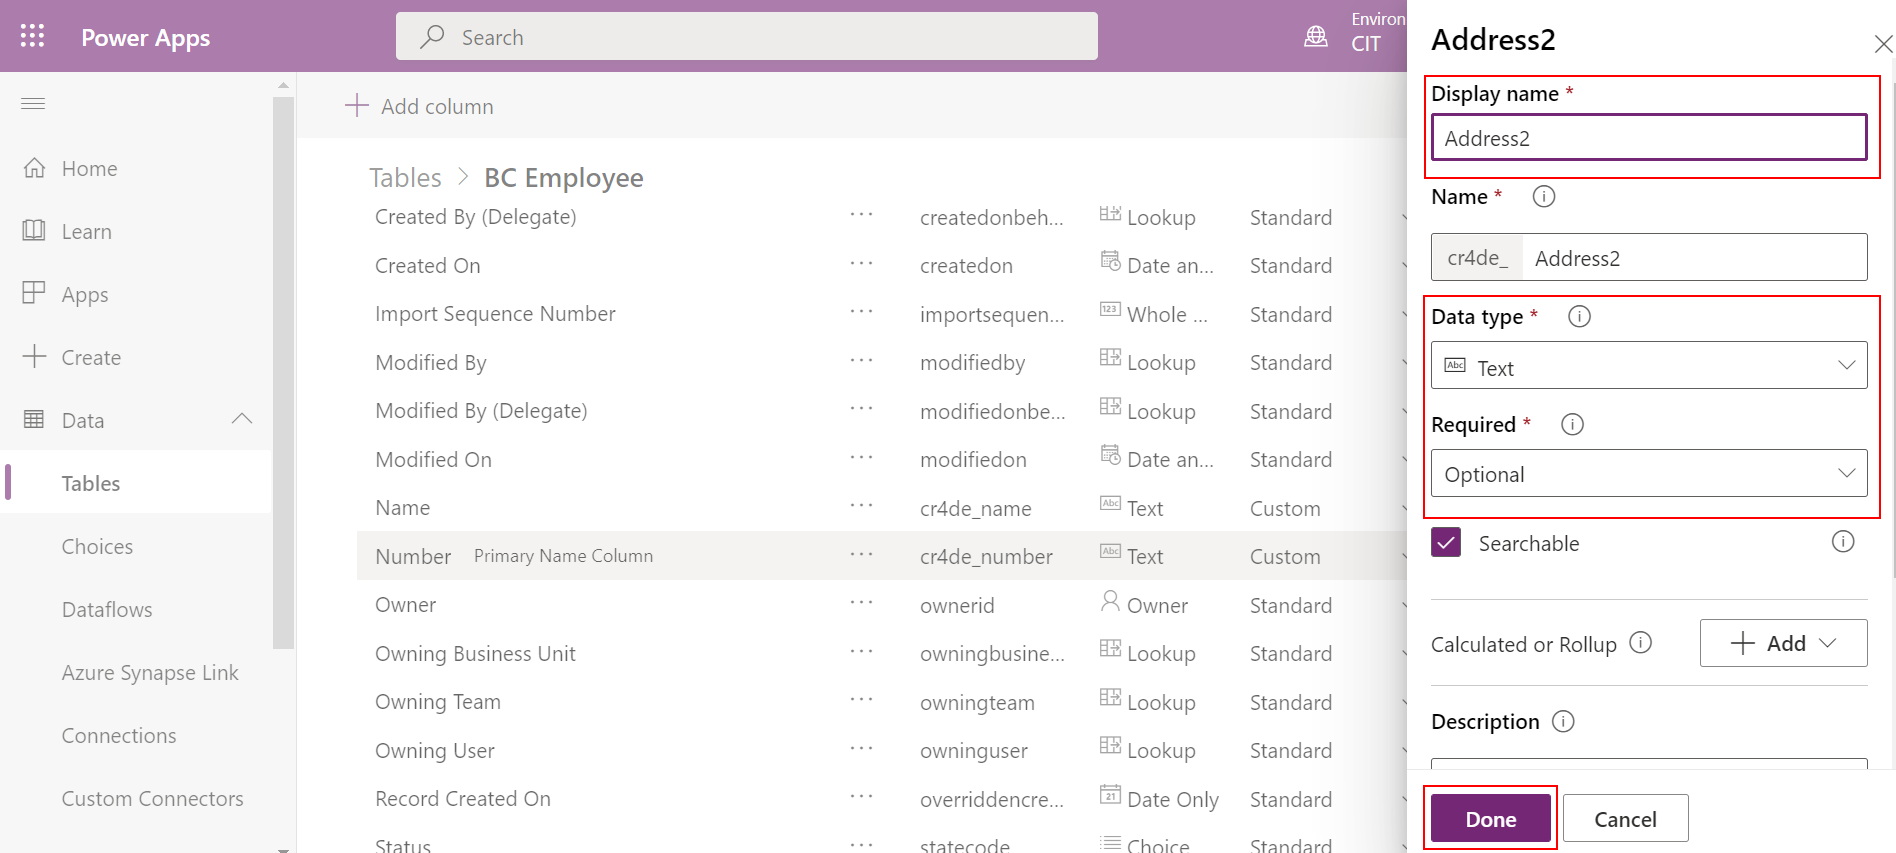
STEP 3: Once the table is created, the columns (fields) are added to the table. Click on add column from the top action ribbon. Provide field details like field name, data type and optional details and click done
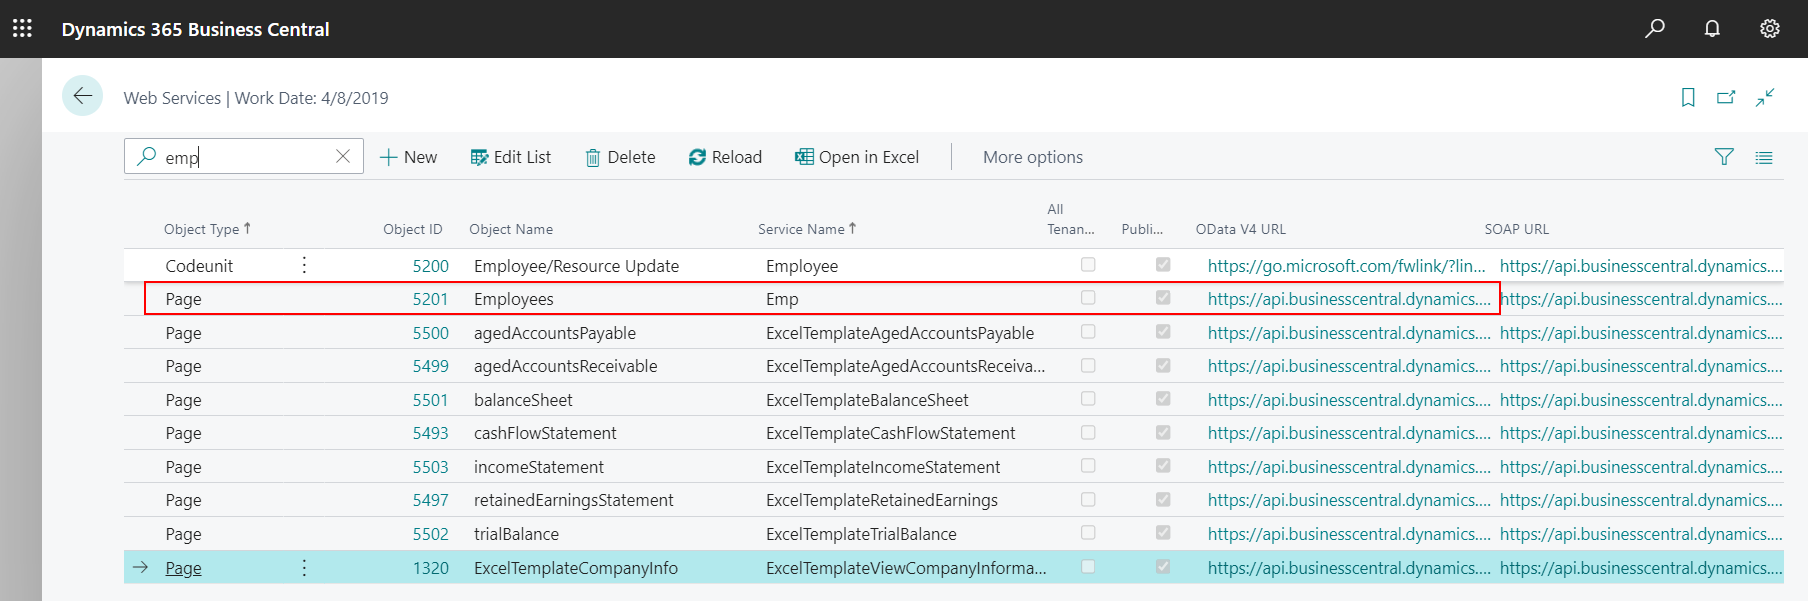
STEP 4: Now, login into the Business central environment and search for web service. Click new to create a web service for the new table in portal. We can also make use of existing web services. Once web service is created, copy the Data link of the page, user name and web access key
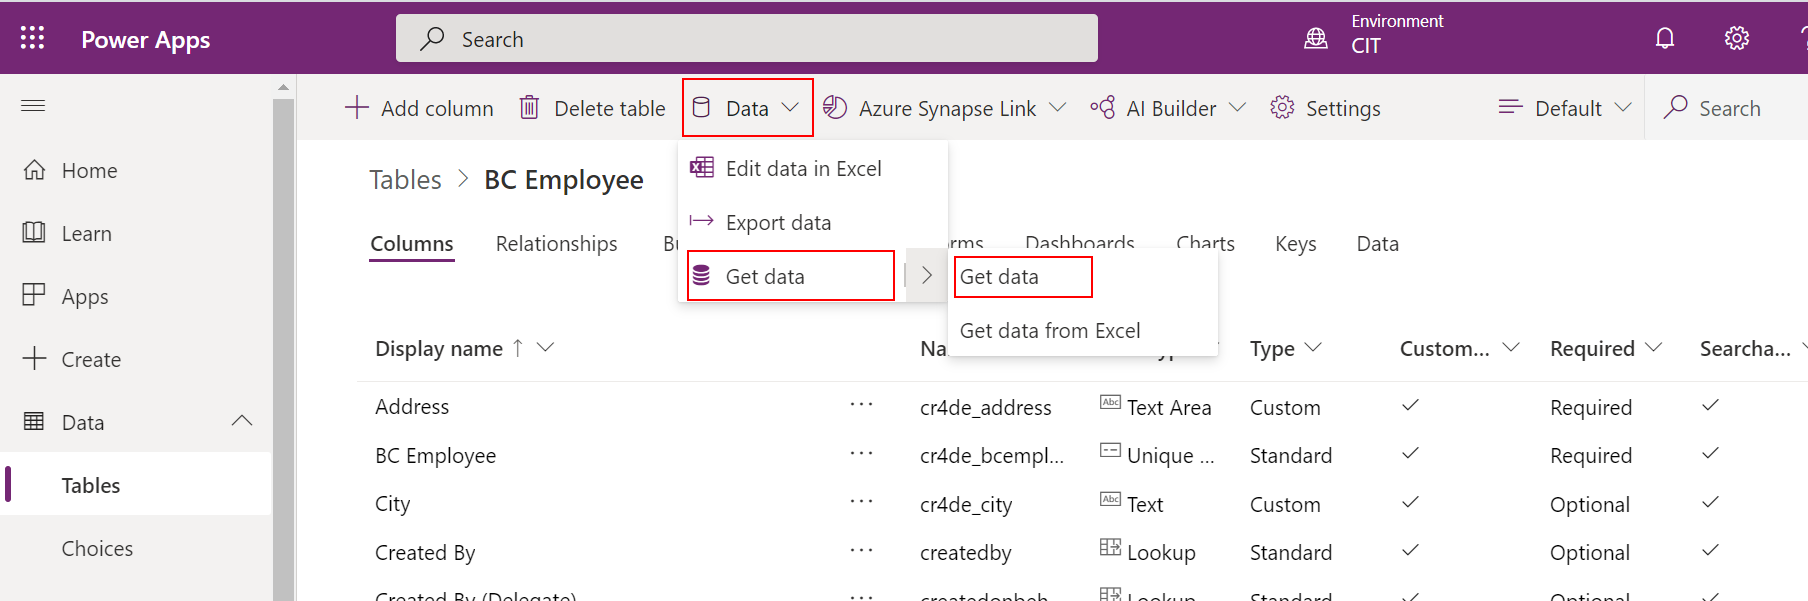
STEP 5: Again, switch to the table in PowerApps. Select data from the action ribbon and click on get data
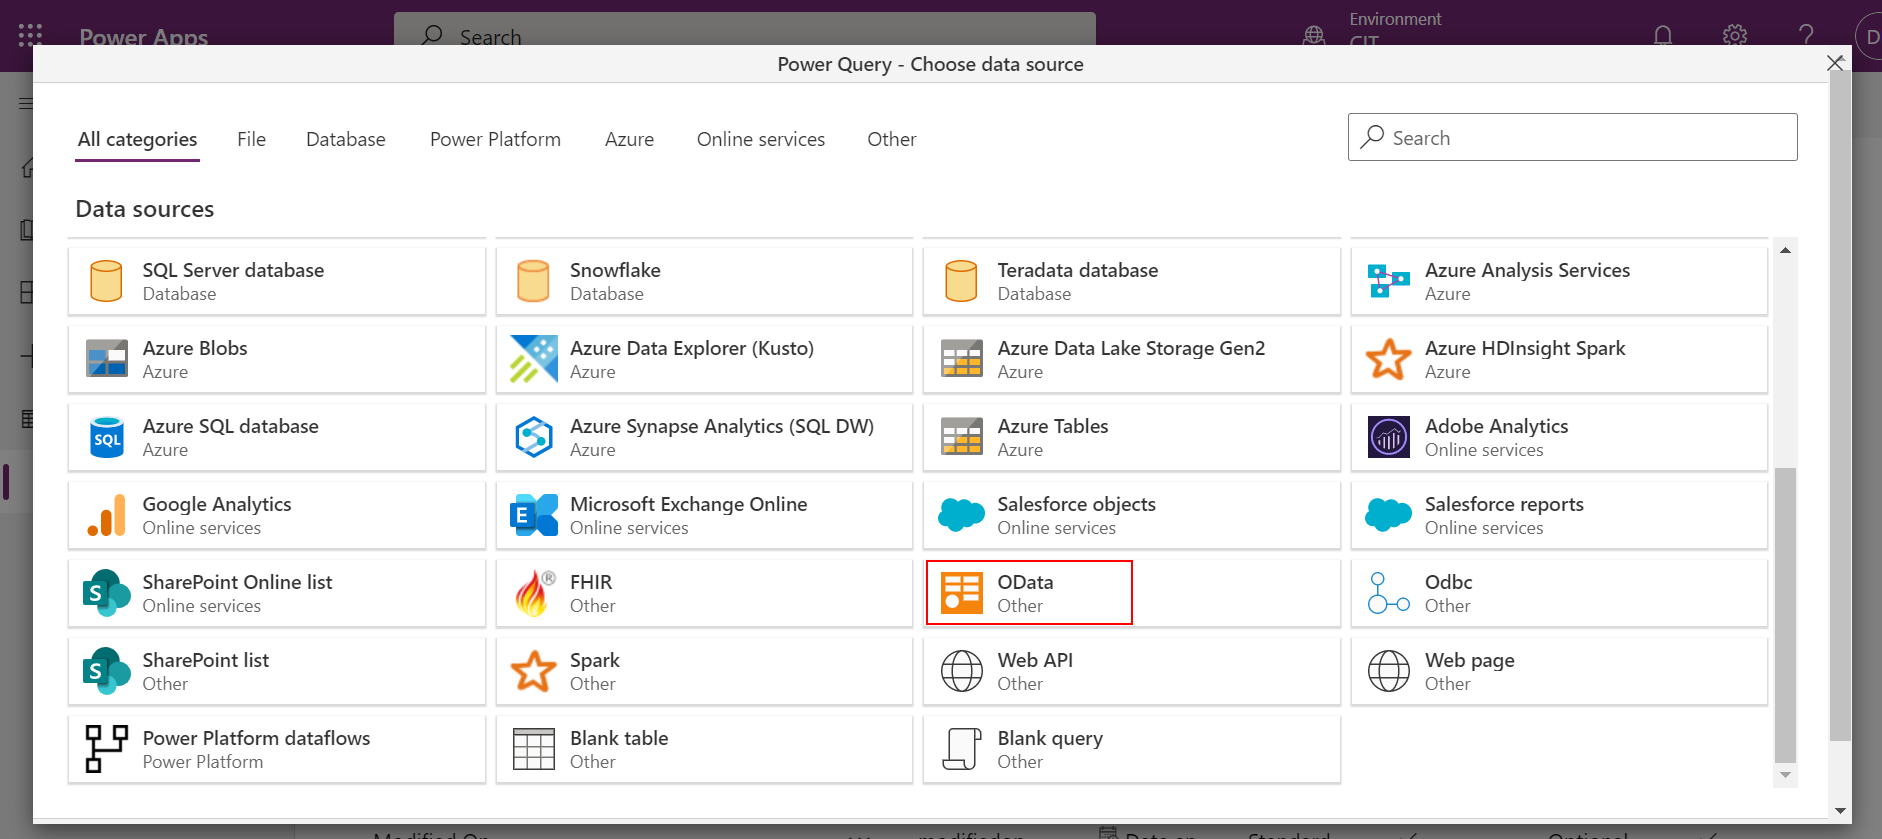
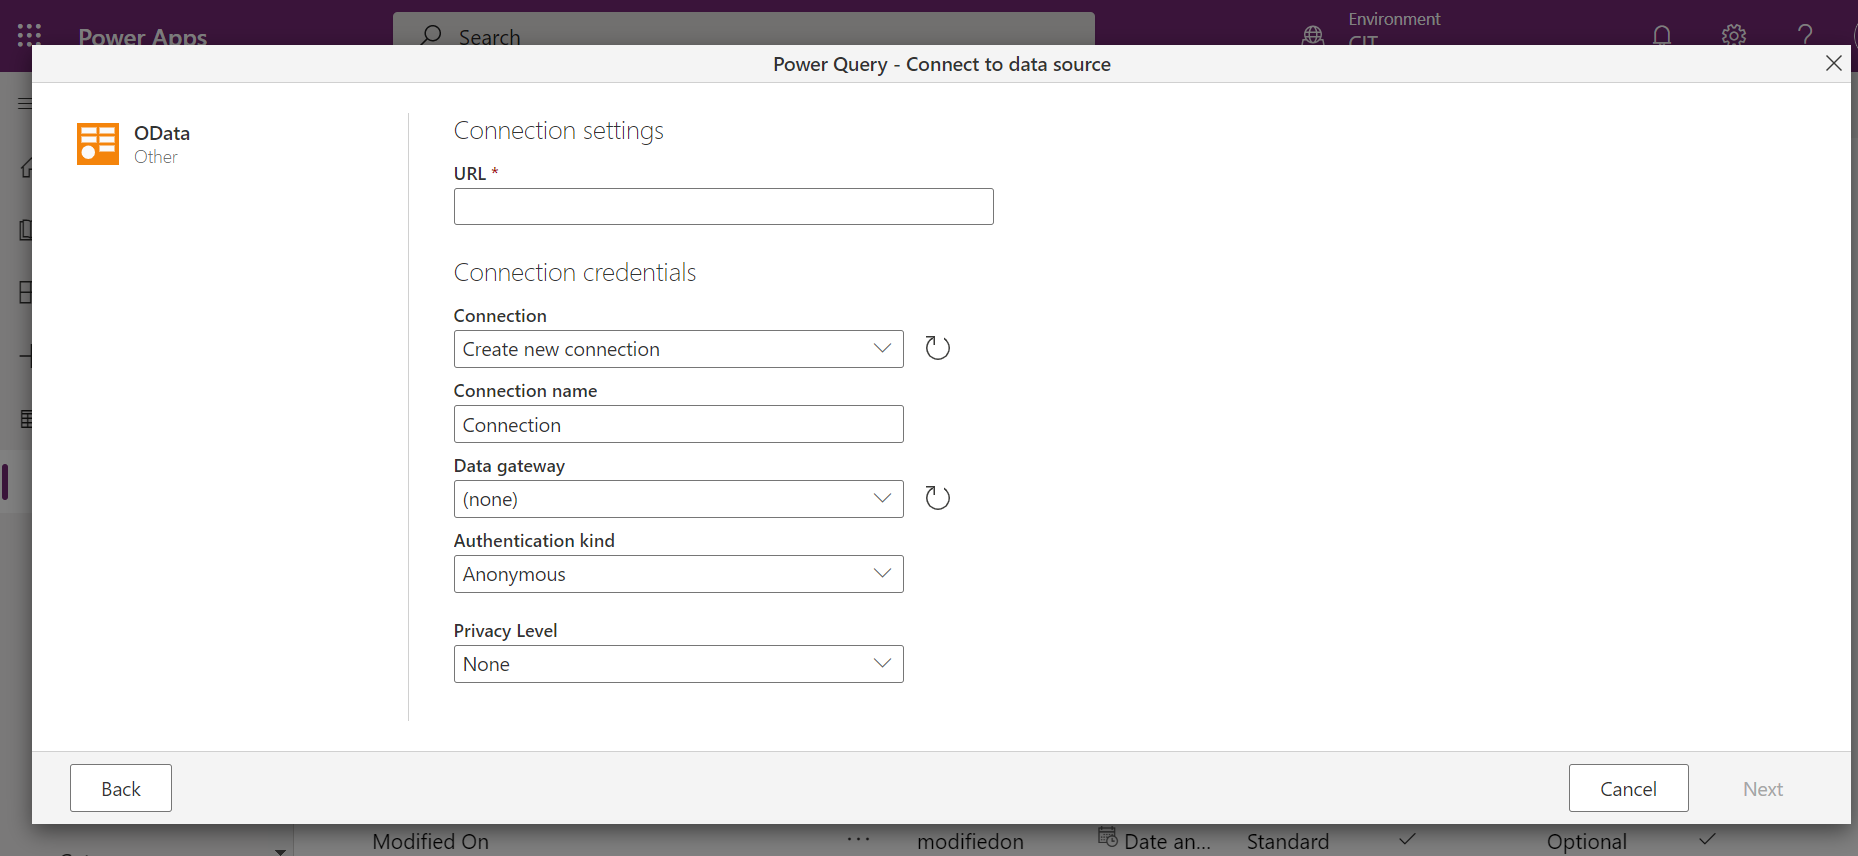
STEP 6: Select OData tile from the get data action
STEP 7: Copy OData URL of the web service and select create a new connection and sign in to provide Business central access details. Select the authentication kind as an organizational account. On successful login into the connection settings, click on next
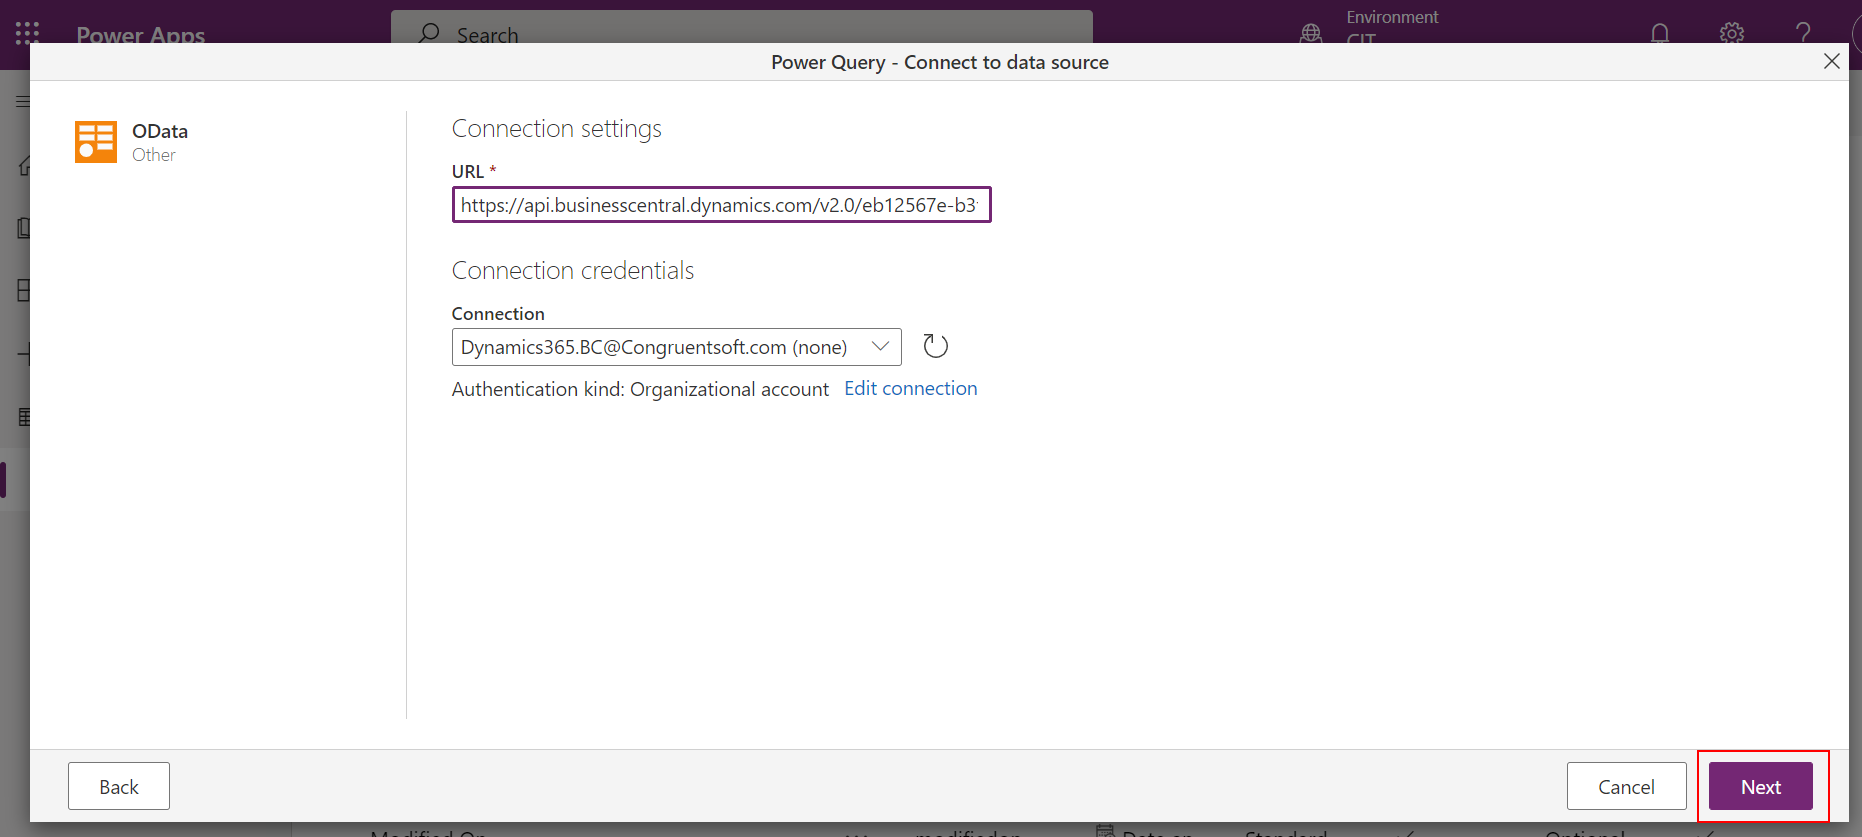
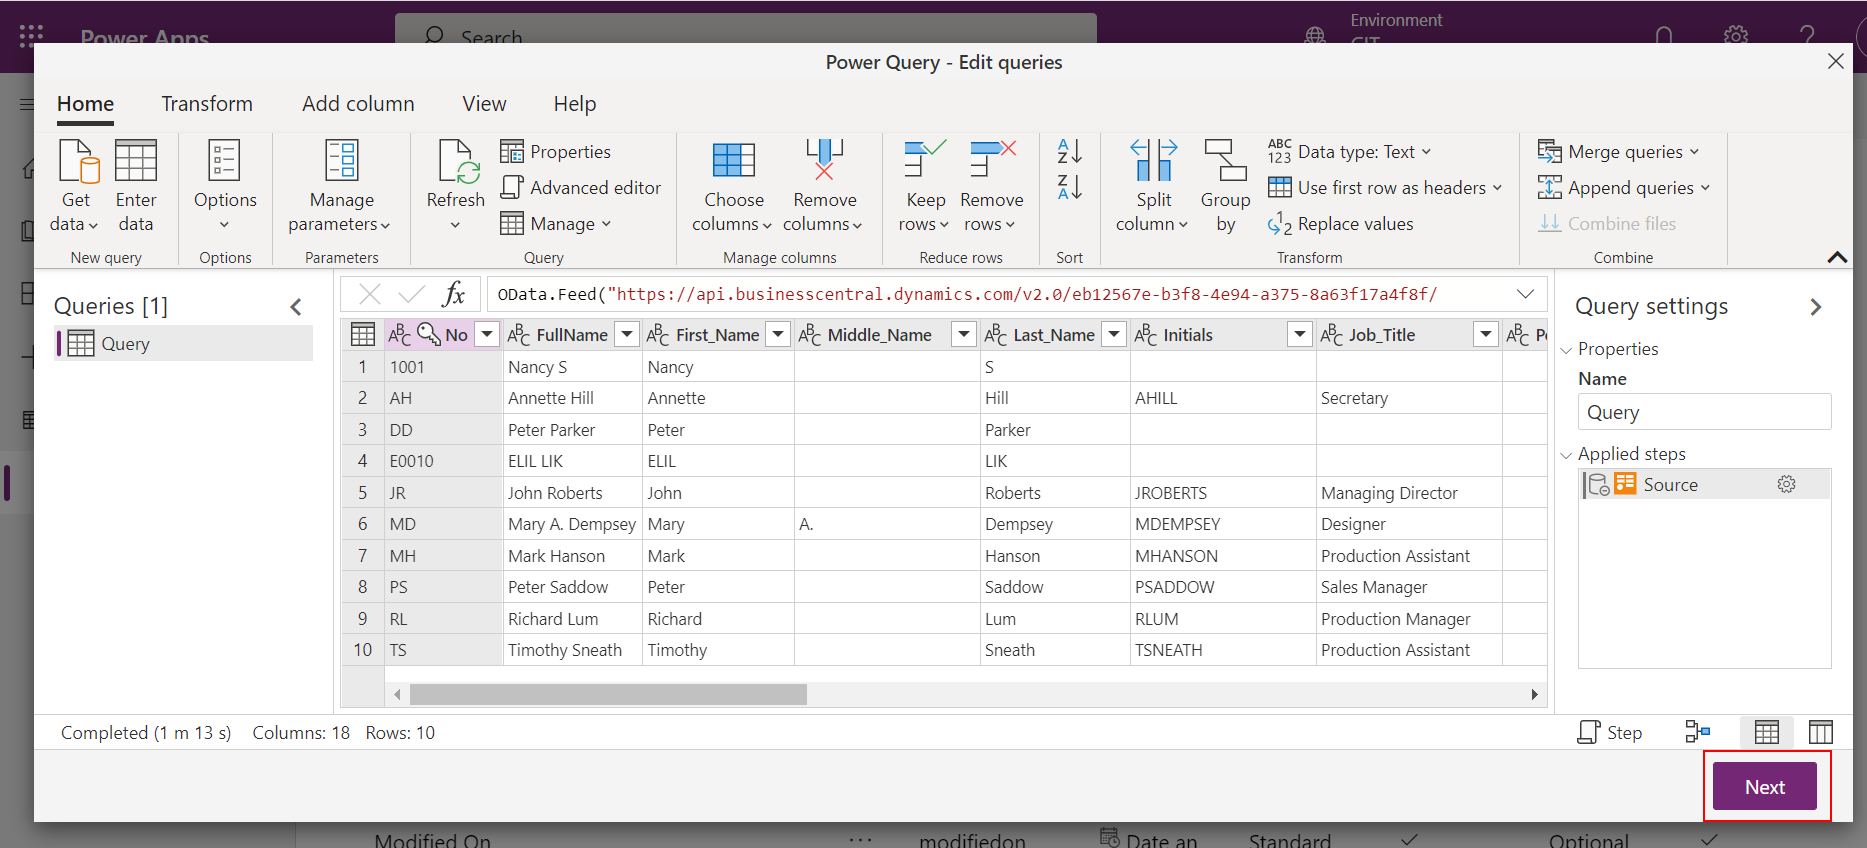
STEP 8: Based on the web service URL the table structure and details in Business central will be visible
STEP 9: Since the table is already created in PowerApps, select load to the existing table from the load settings and select the destination table as the already created table in PowerApps
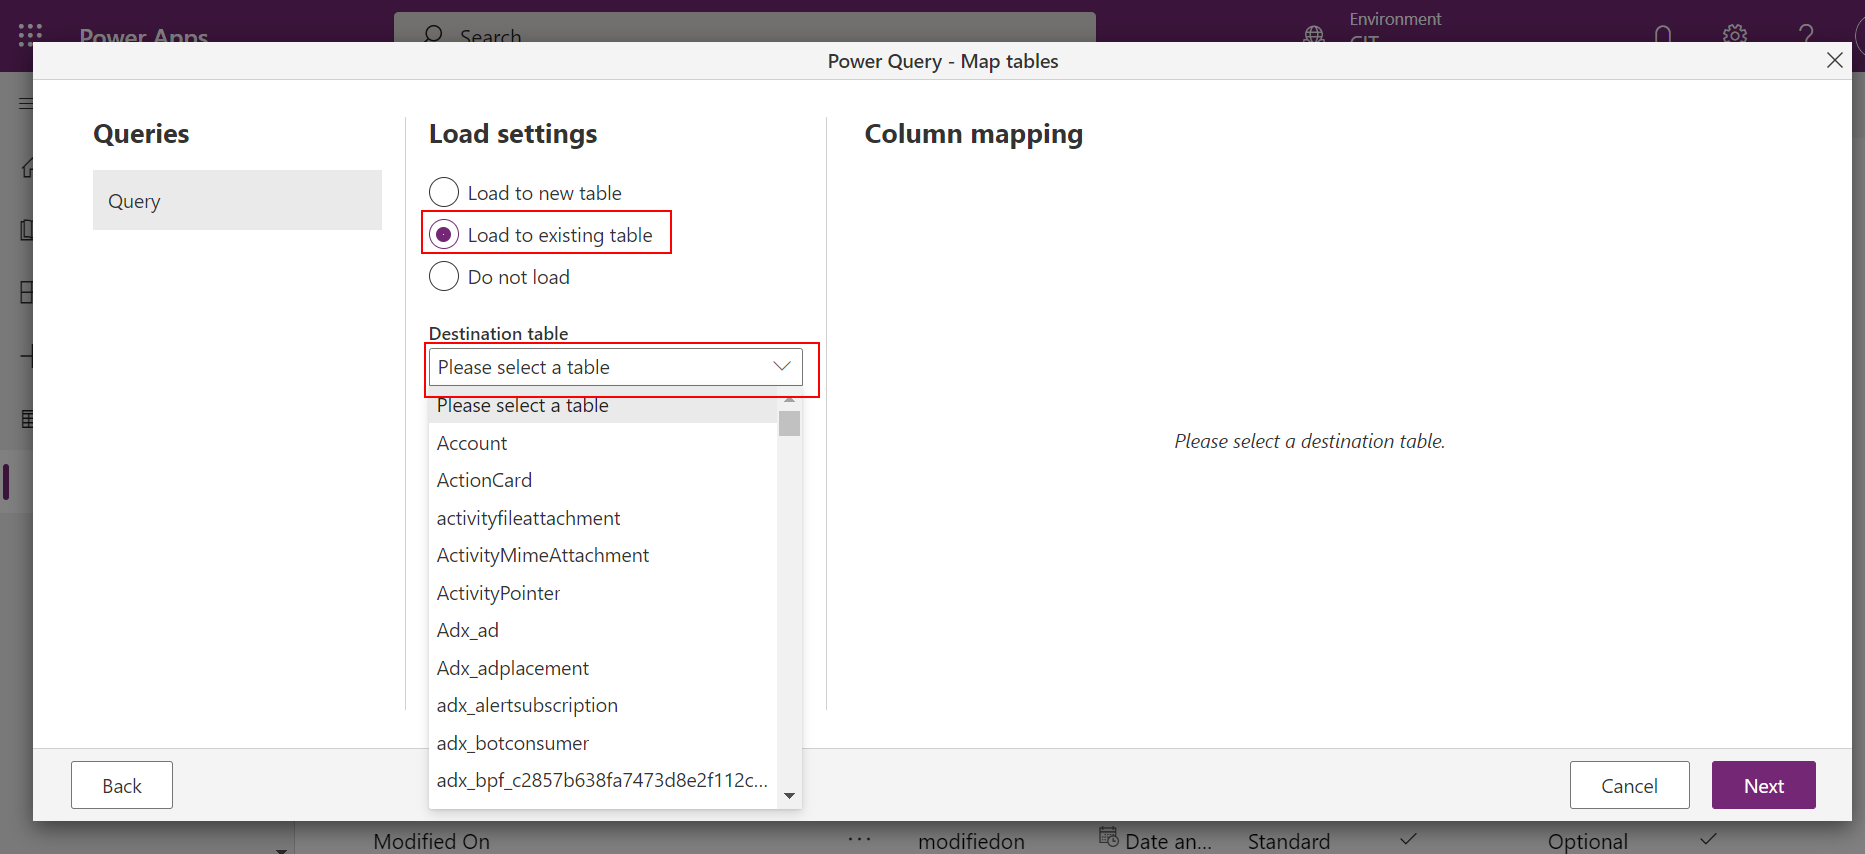
STEP 10: Based on the destination table, the columns that are added to the table can be viewed. Now, map the column in the table with columns in the Business central. On mapping all the columns click on next
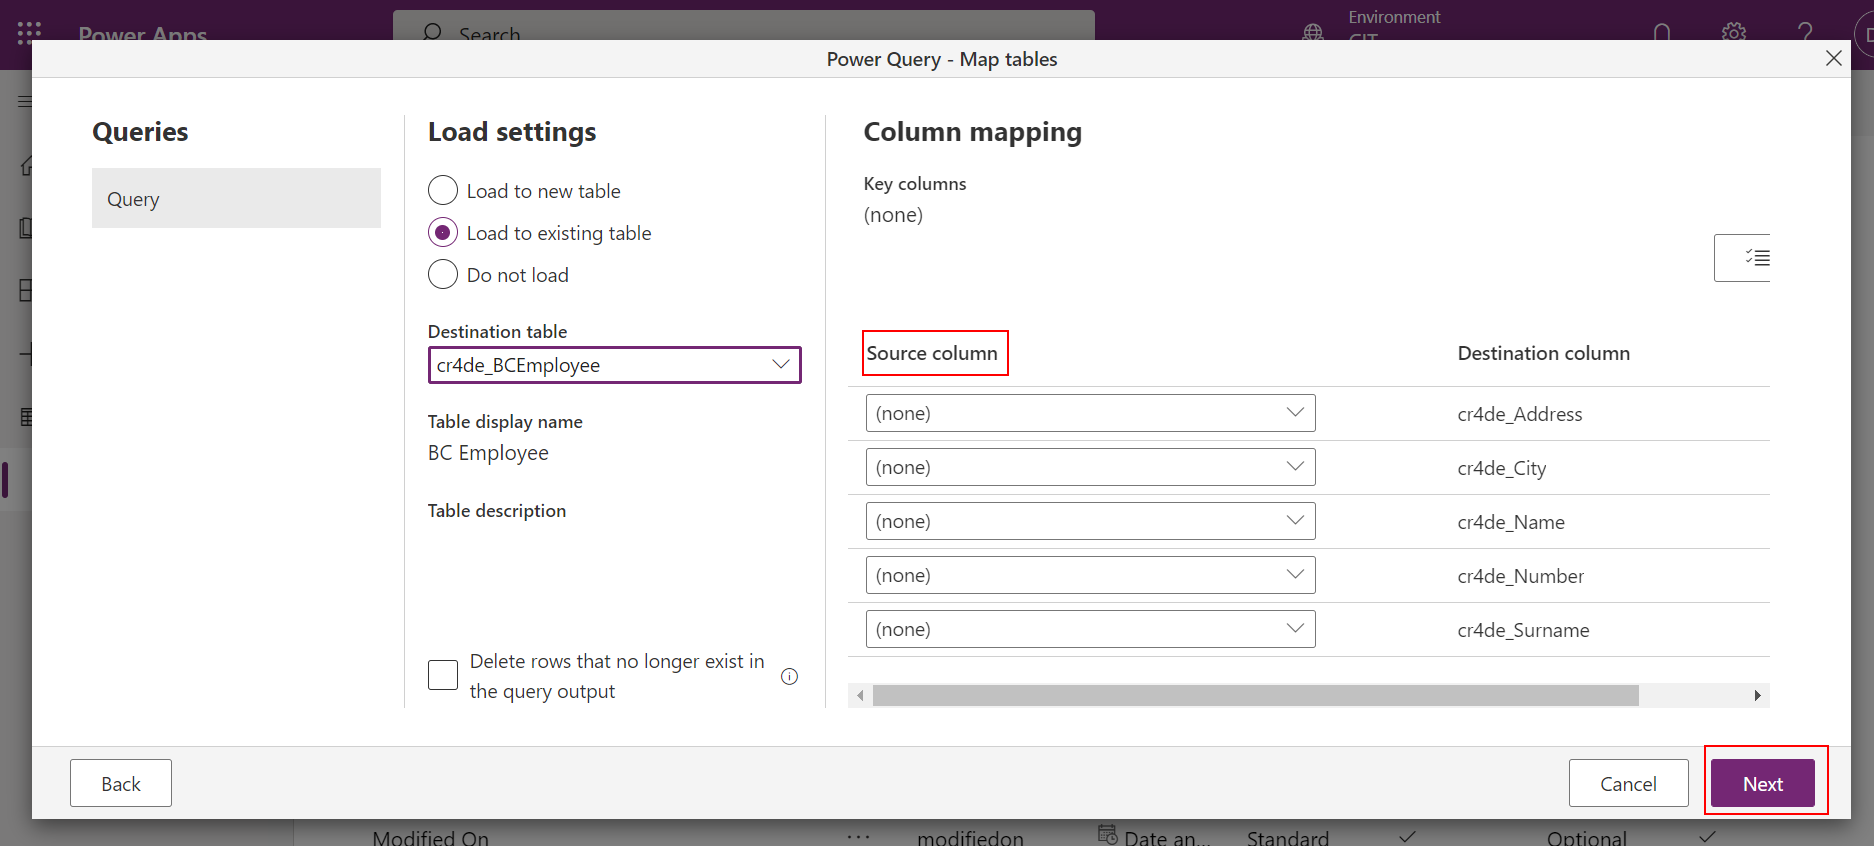
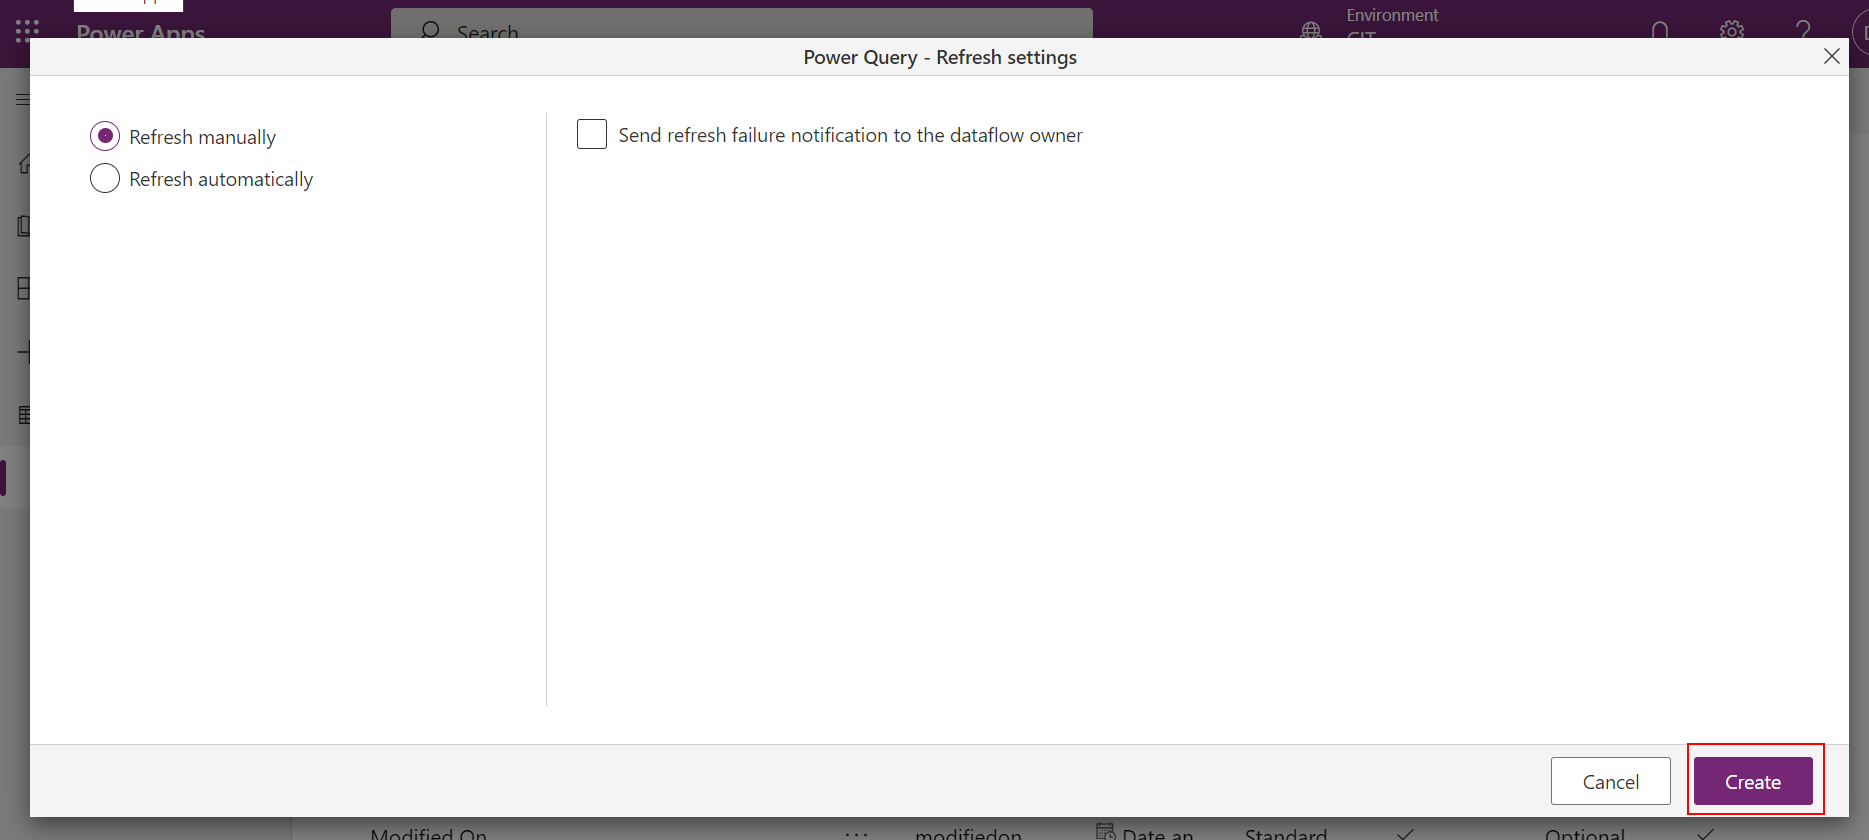
STEP 11: Select refresh option and click create
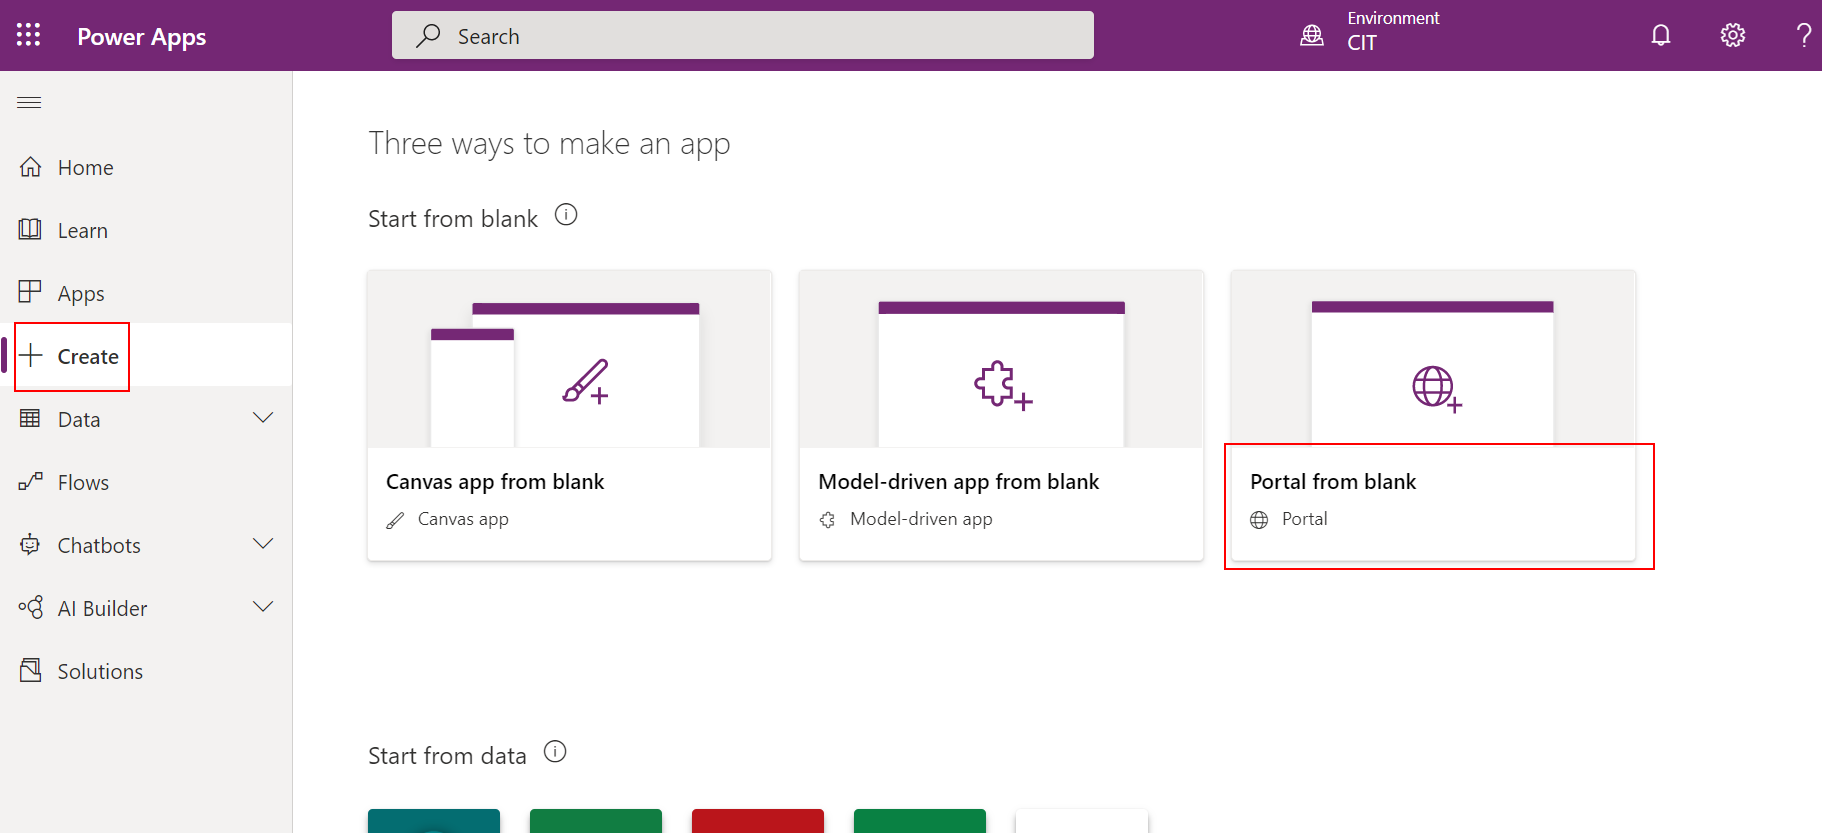
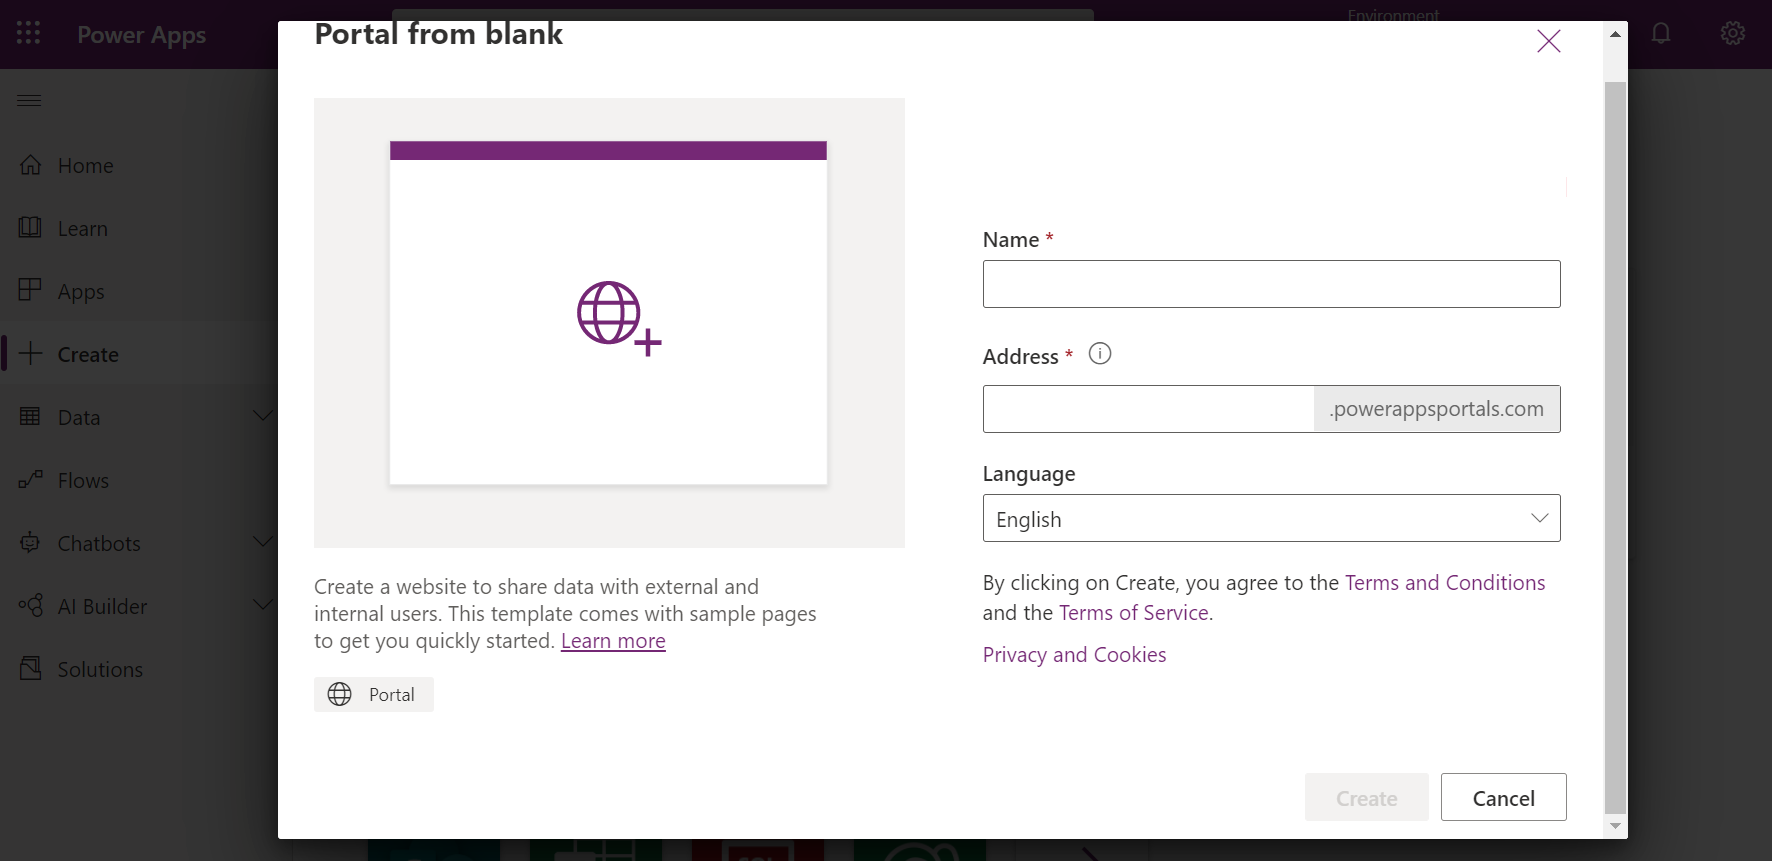
STEP 12: Now move to the home screen of PowerApps and click on create to develop a portal. From the portal creation option, select the blank portal creation. Provide the name and address for the portal. Click create to develop a portal
STEP 13: Click on the new page and choose a blank page to create a portal. Also, the existing templates can be selected for creating the portal
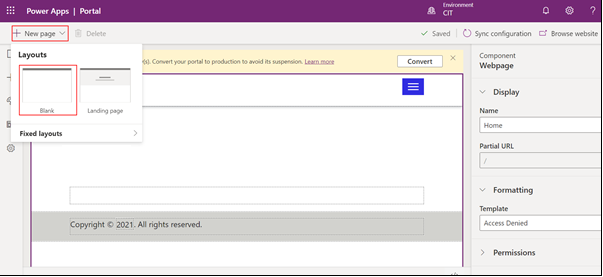
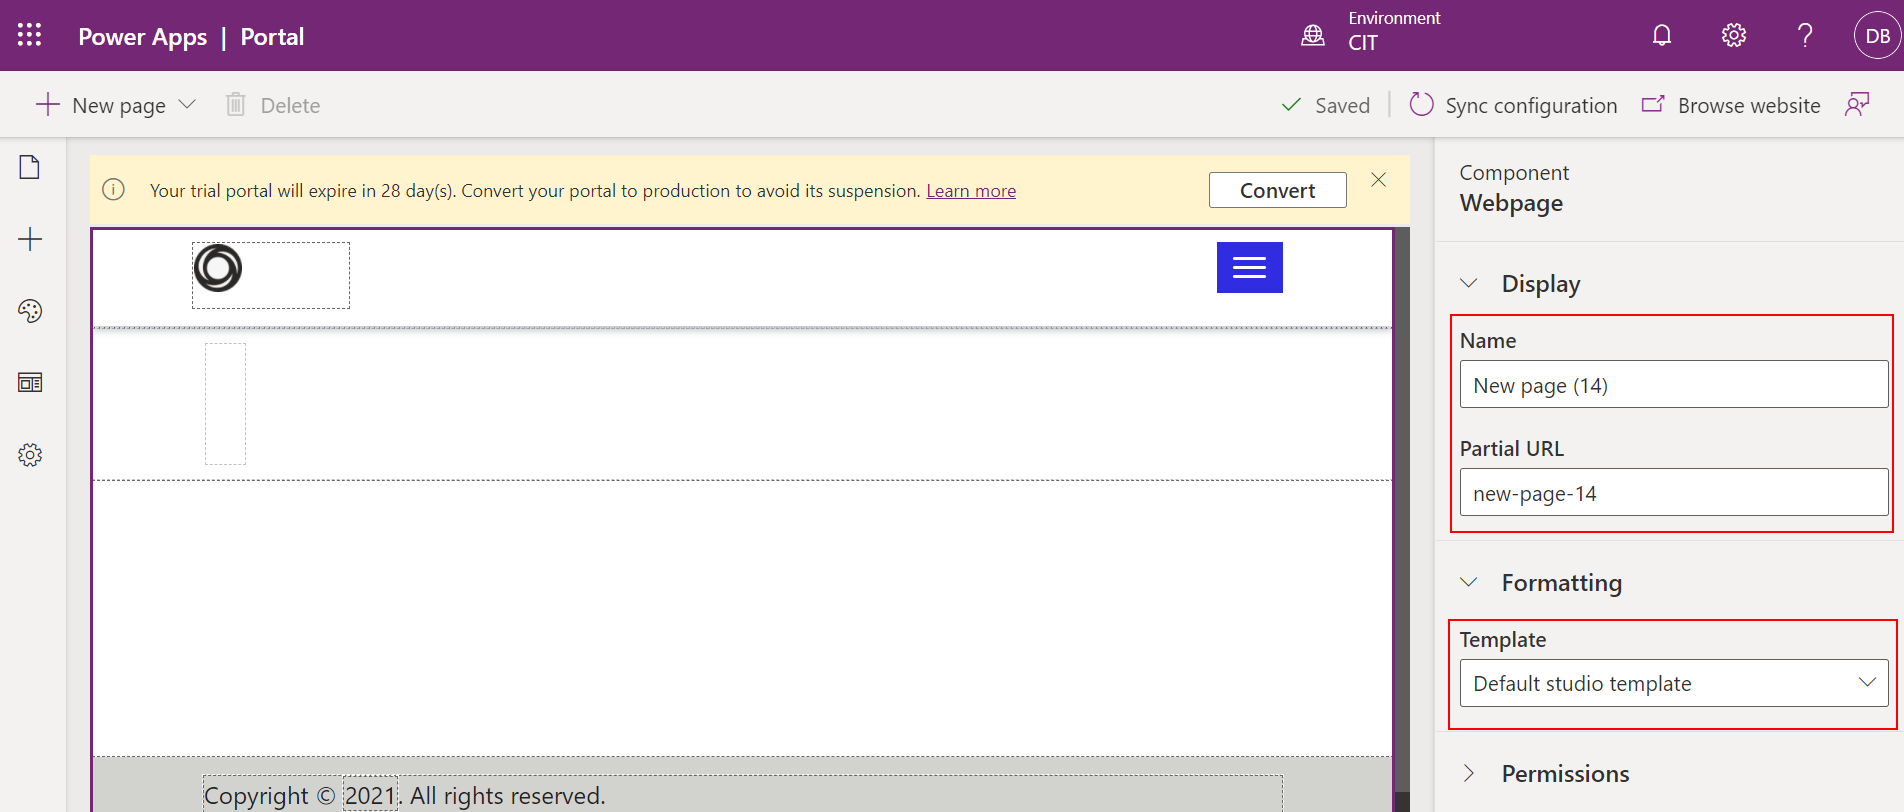
STEP 14: Provide name, partial URL for the portal. To add the components for portal, click ‘+’ on the action bar. Choose create new to add details of the component
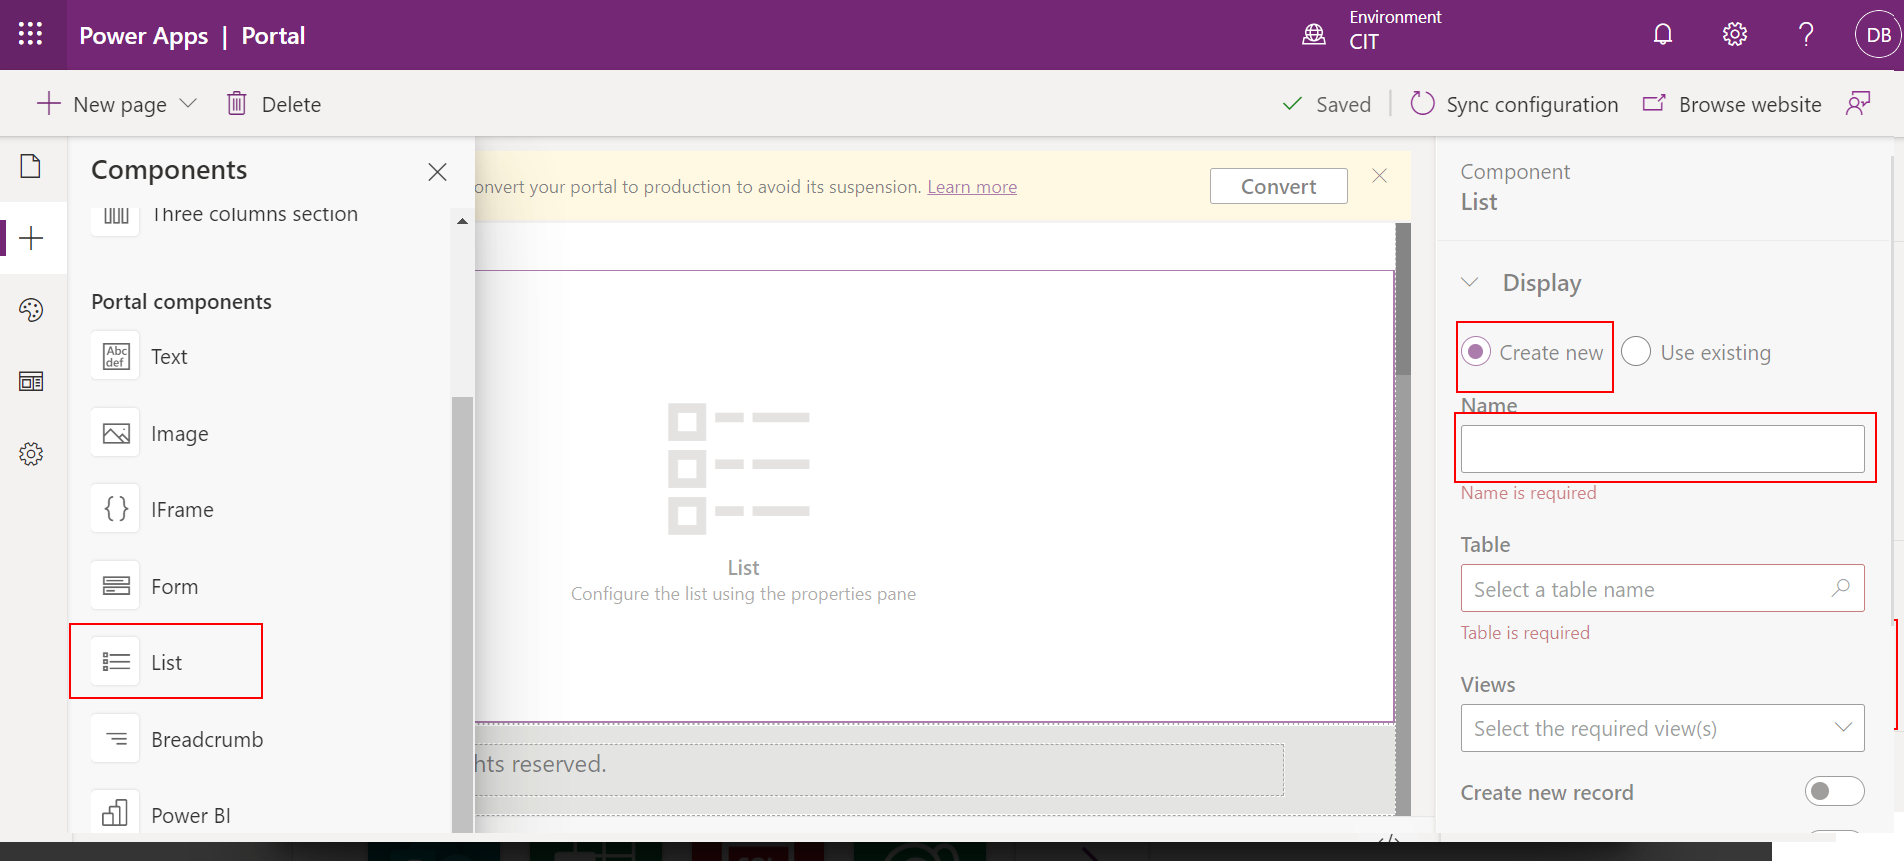
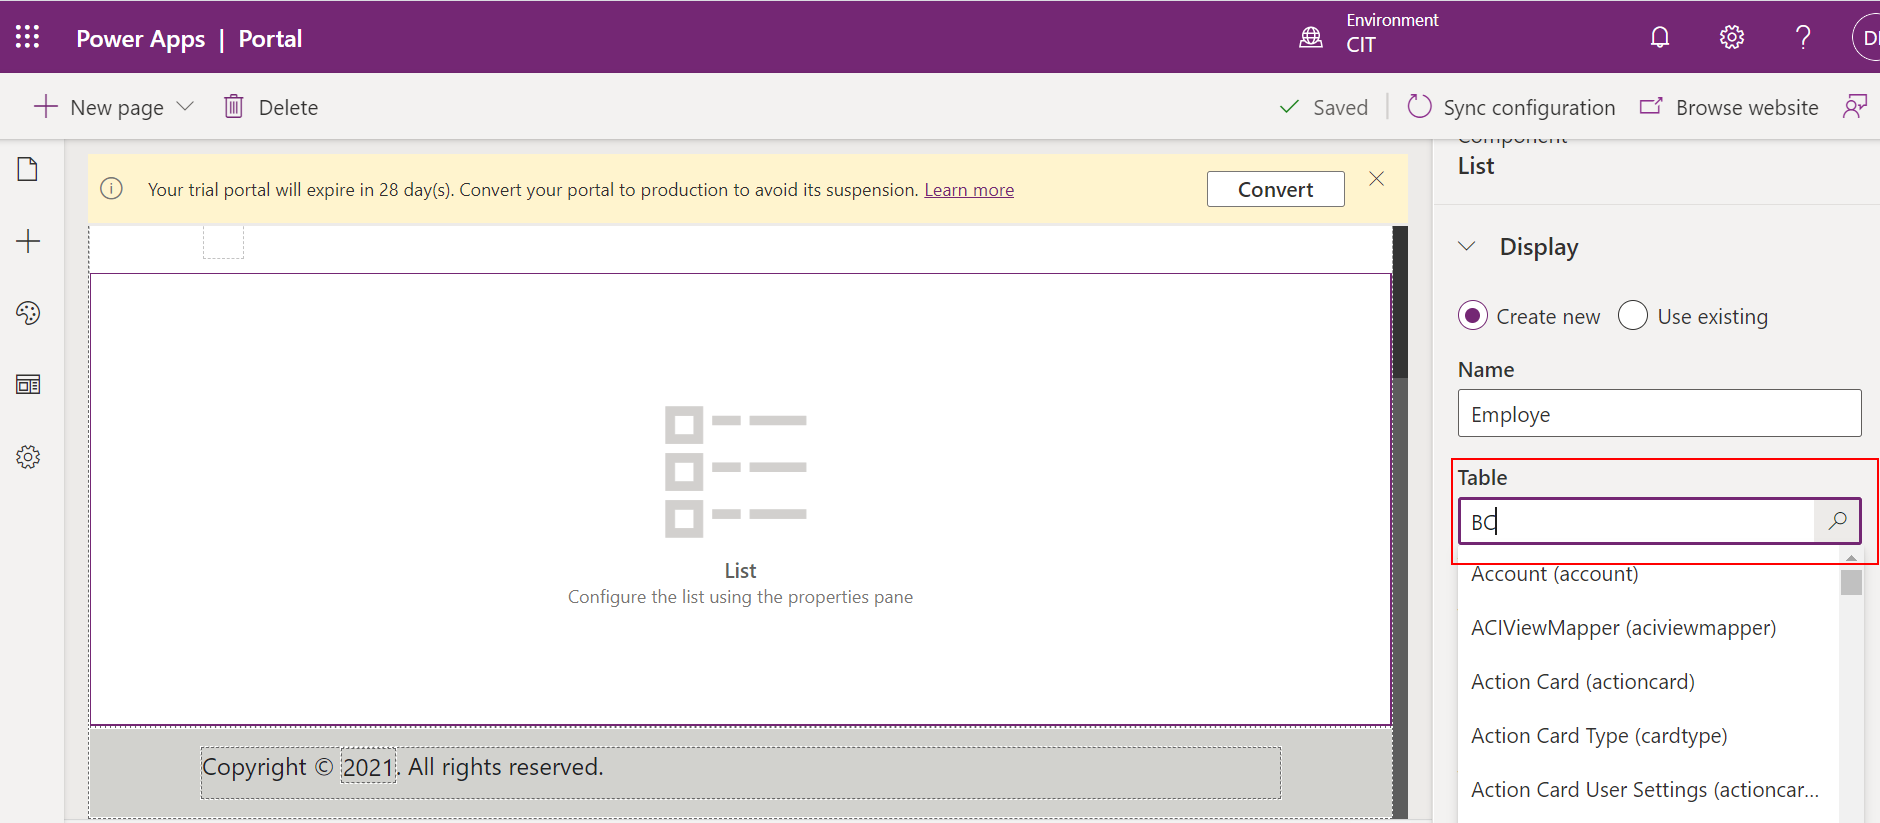
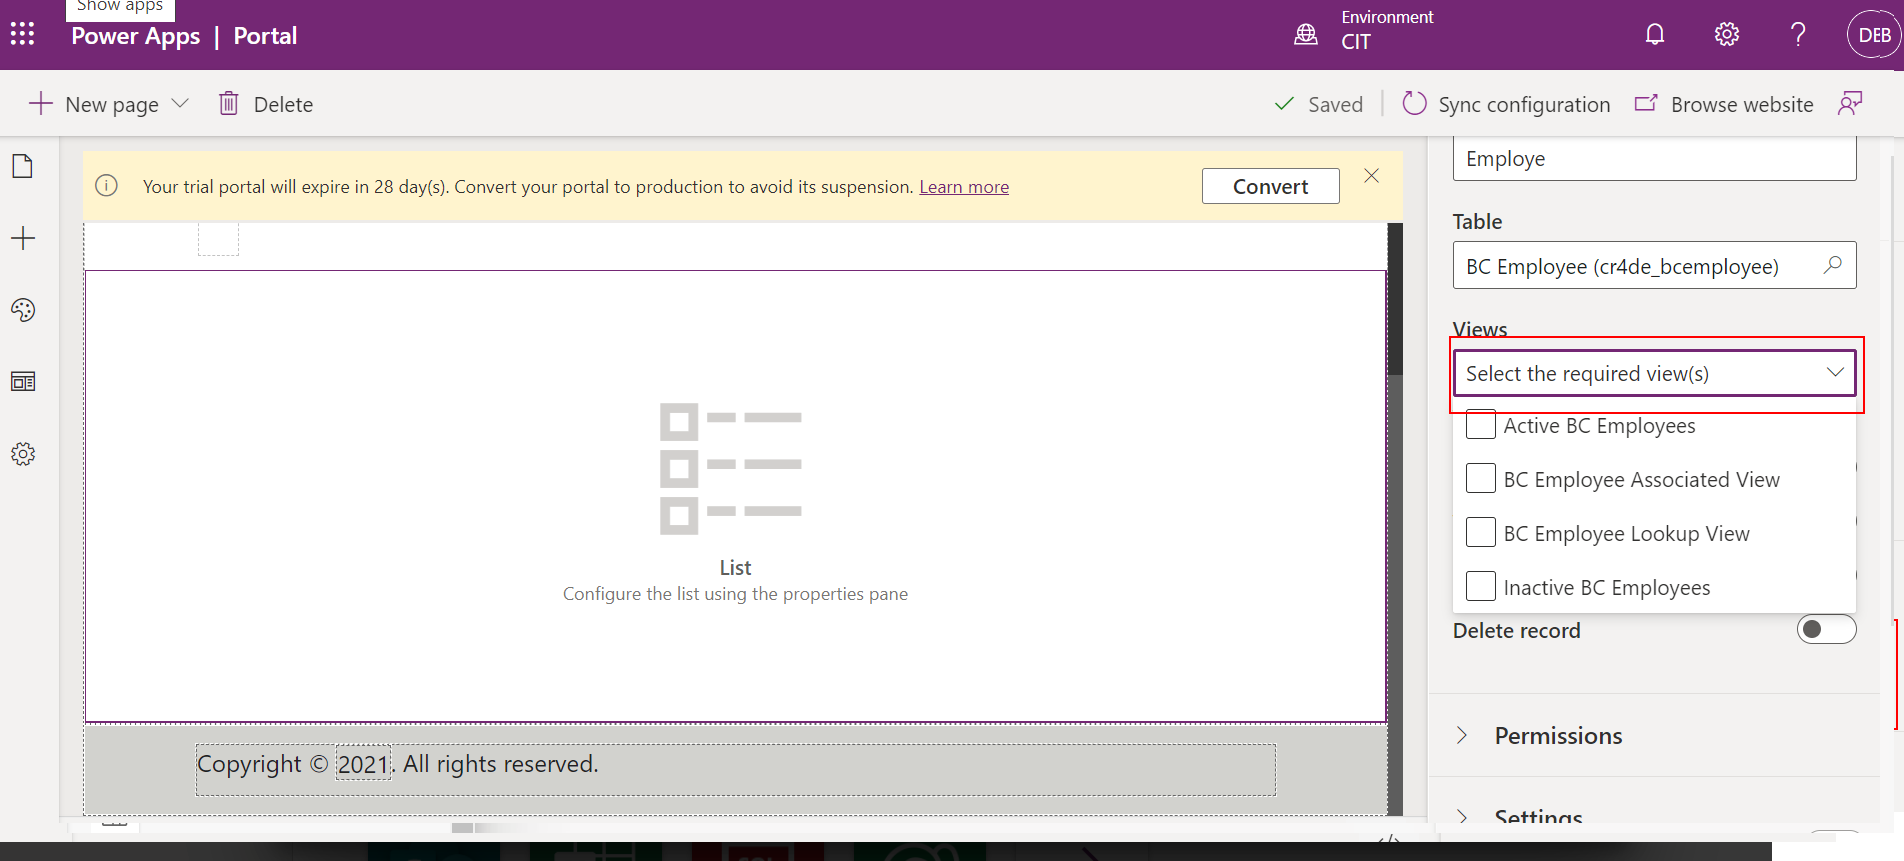
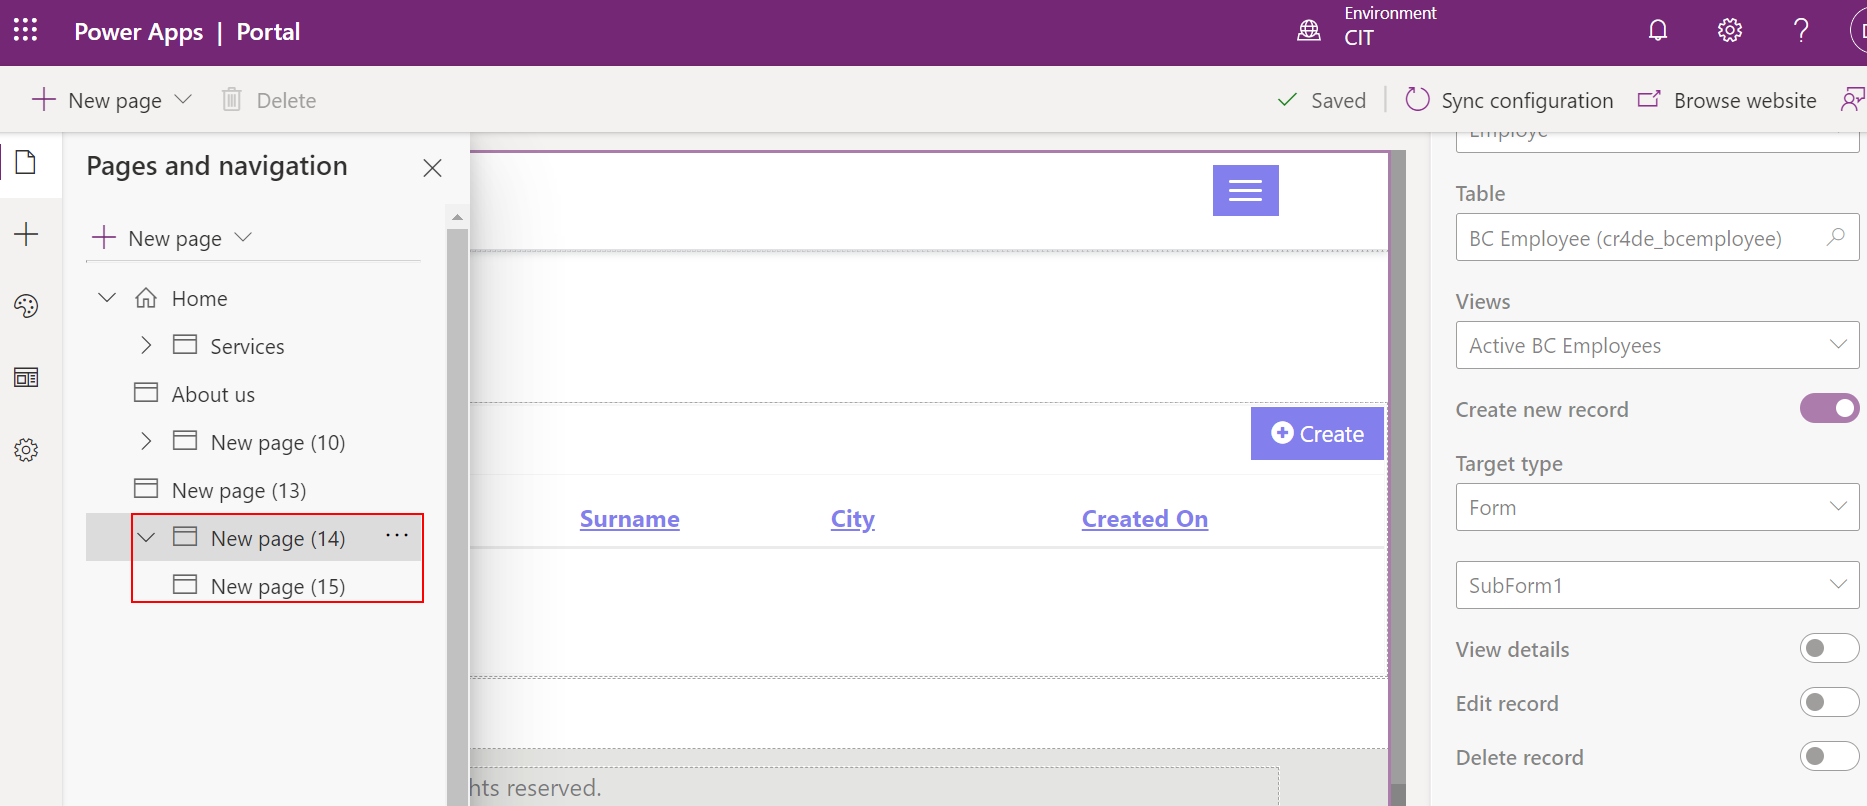
STEP 15: Provide component name and select the table that is already created. Select views for the portal
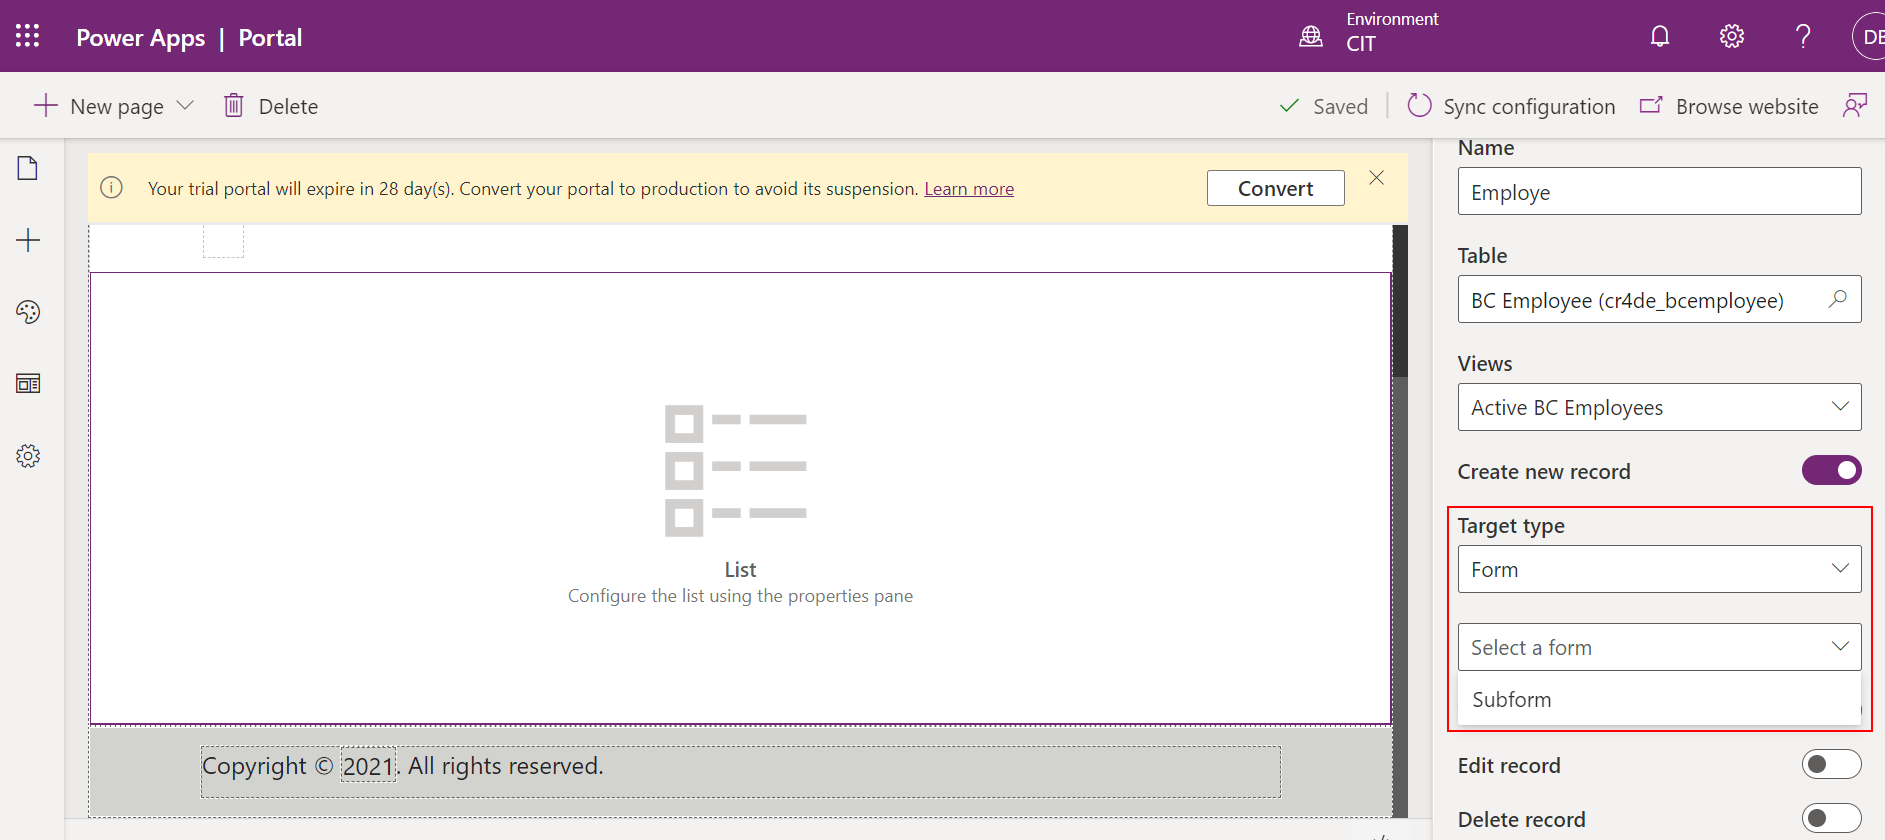
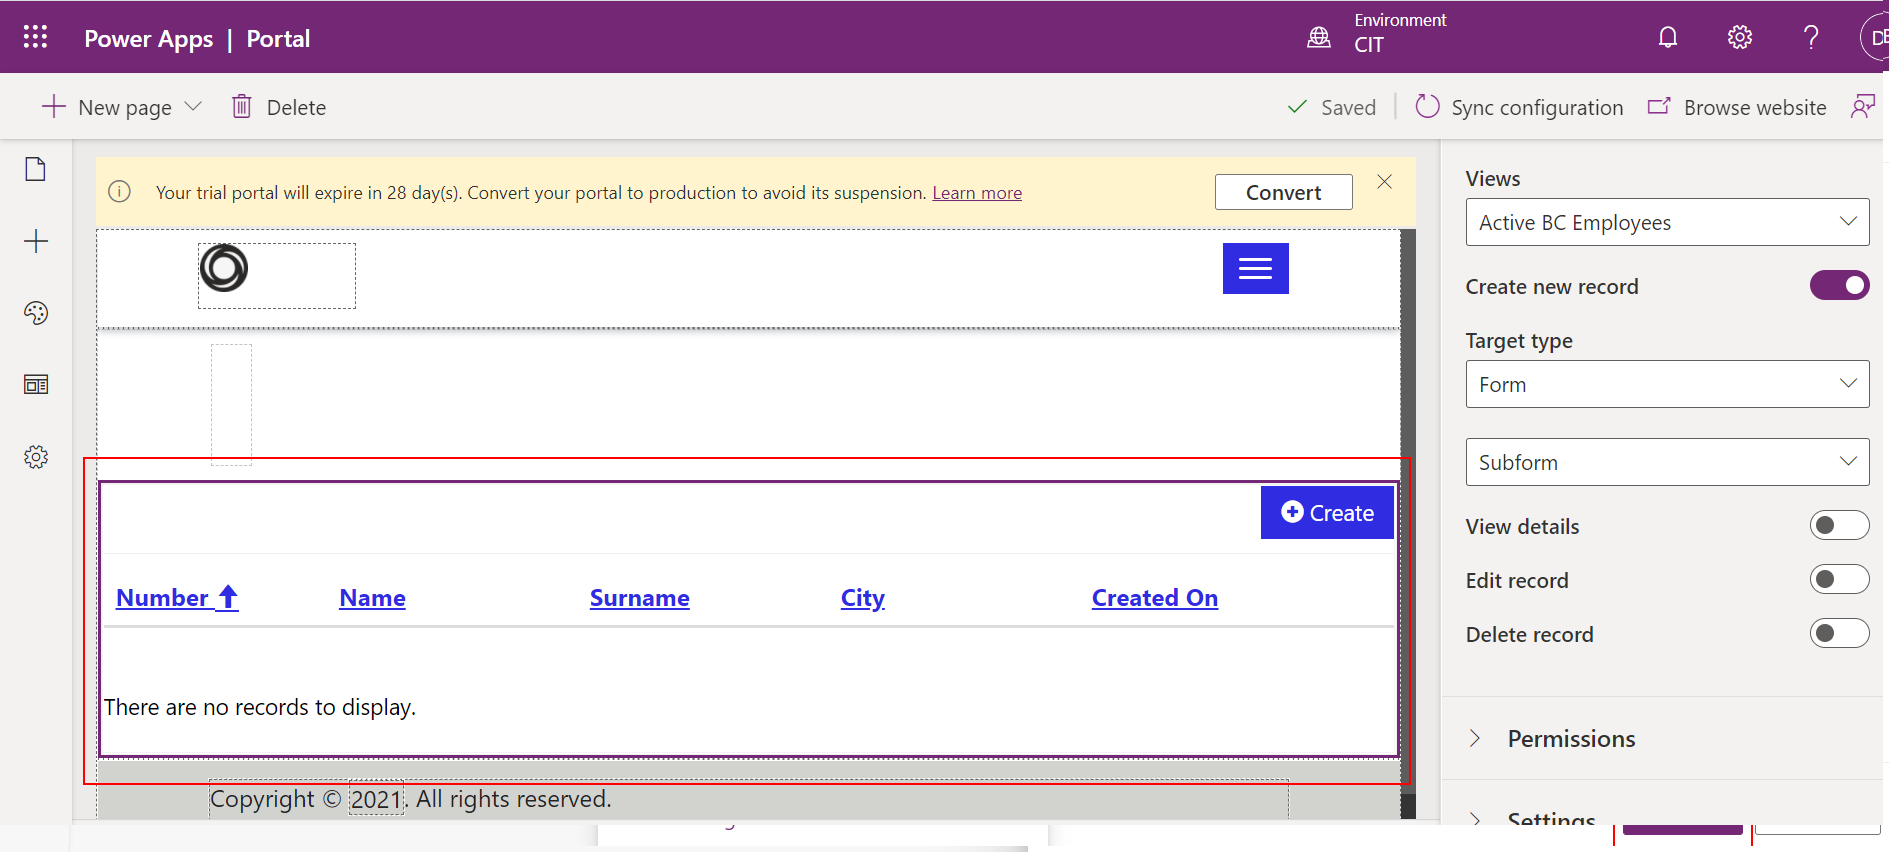
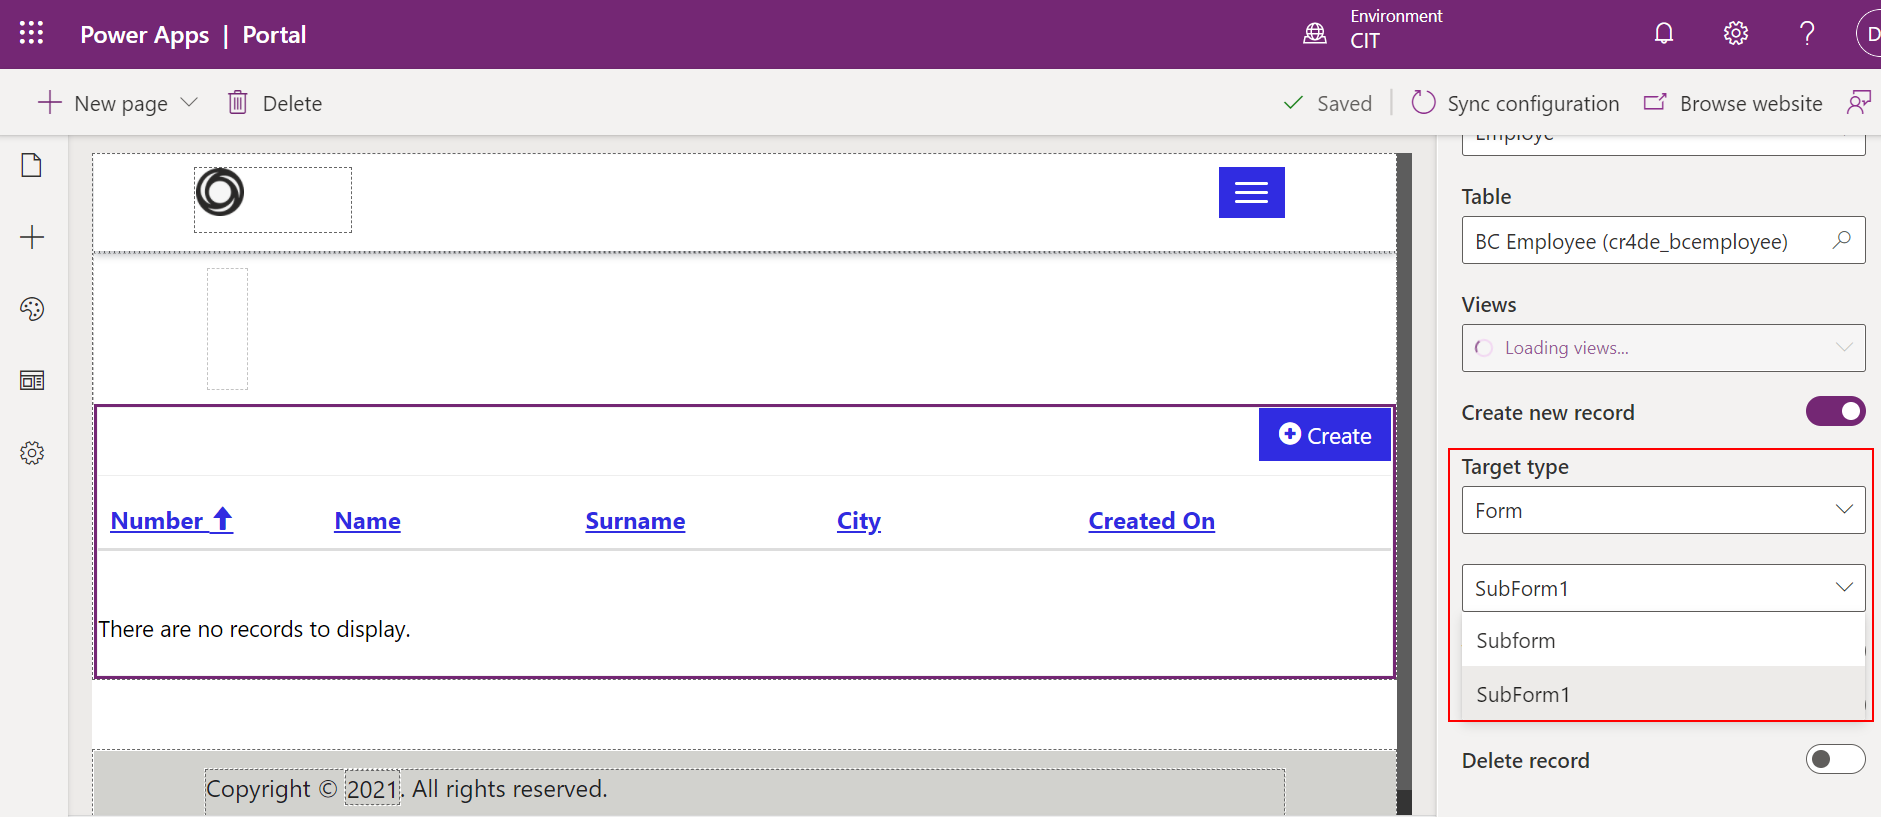
STEP 16: To create new record from the portal, provide the target type. The record access customization can also be managed.
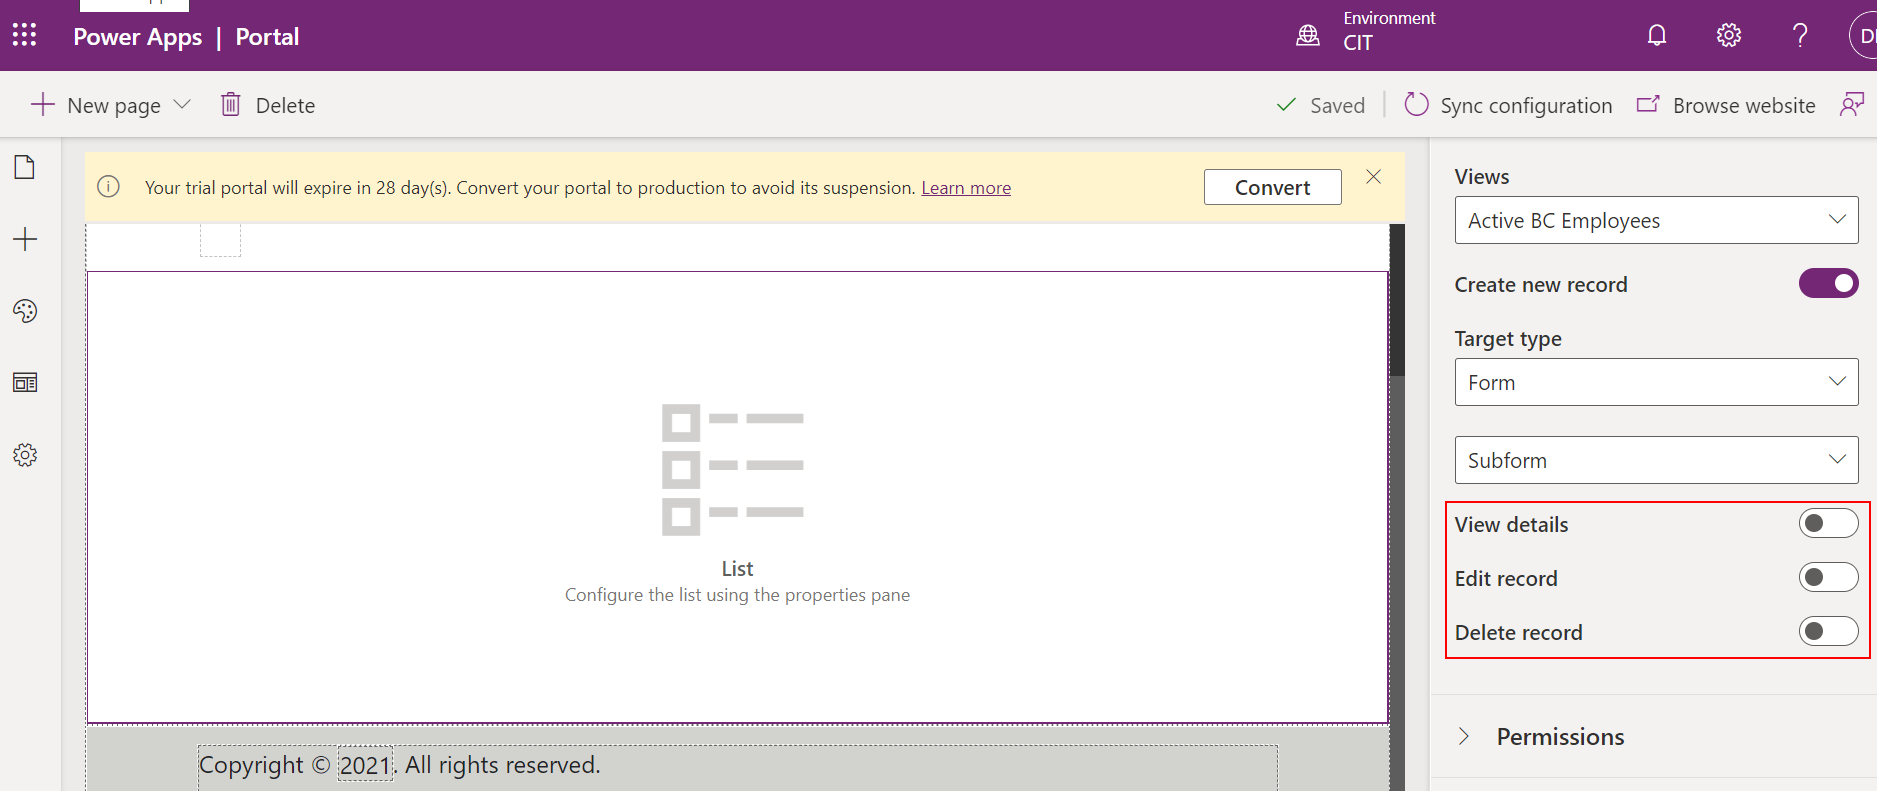
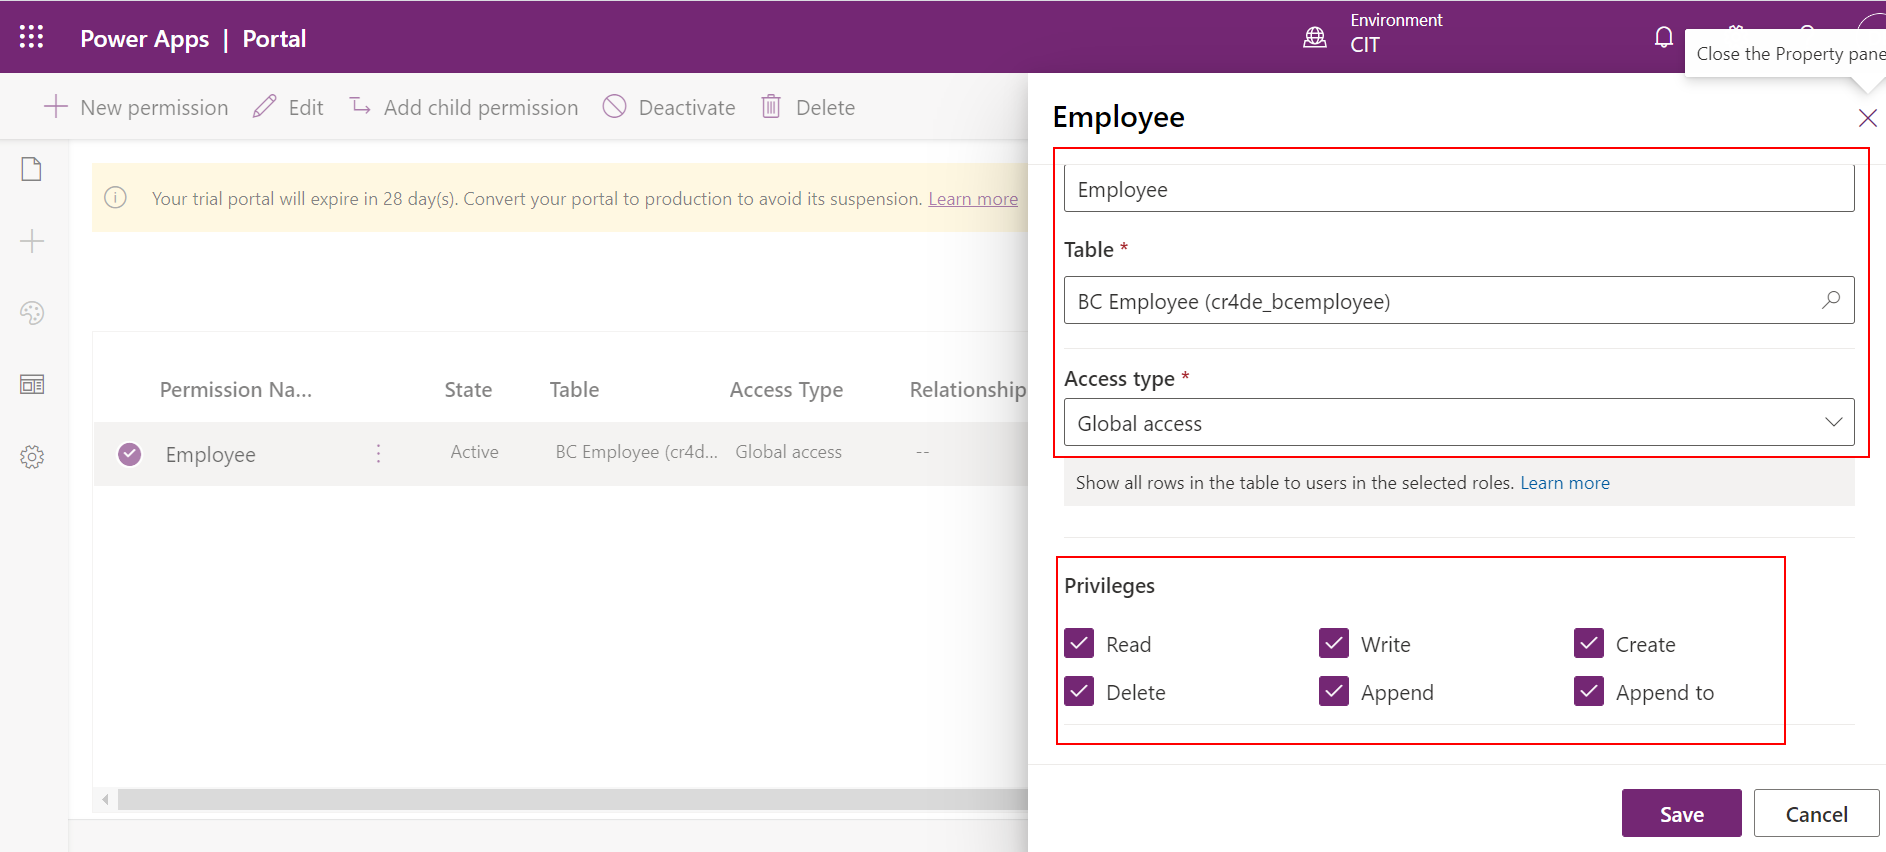
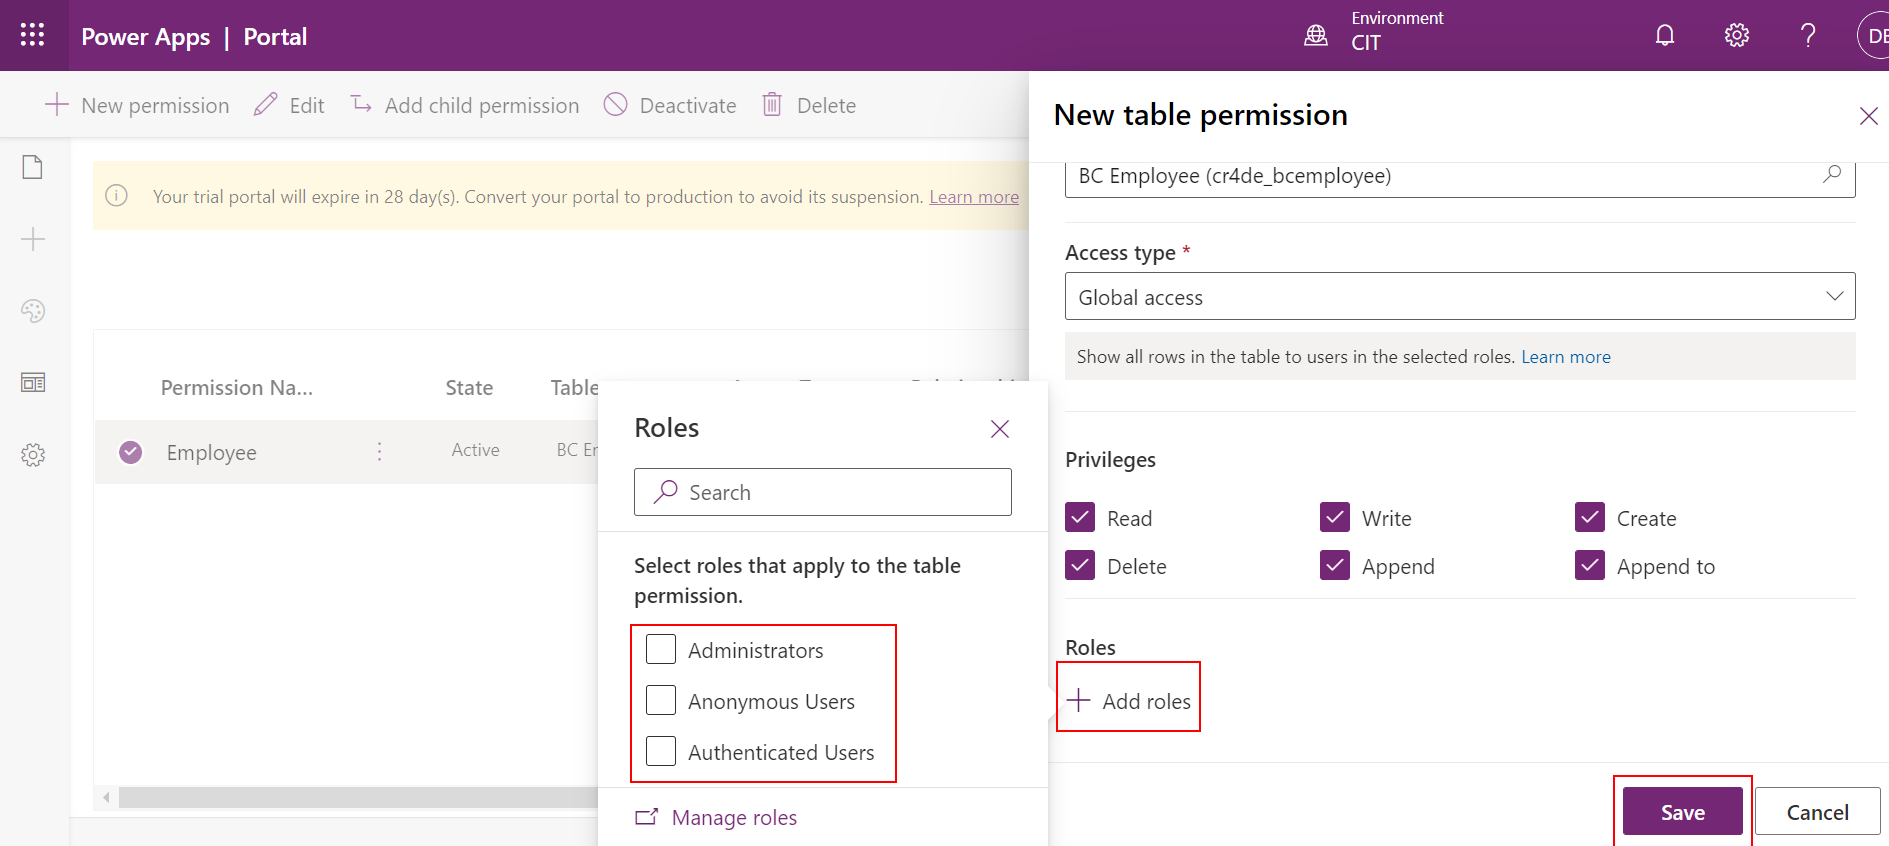
STEP 17: To view and access the record in table from the portal, table permissions should be enabled. Click on manage permission and provide read, write, append etc., permission for the portal and click save
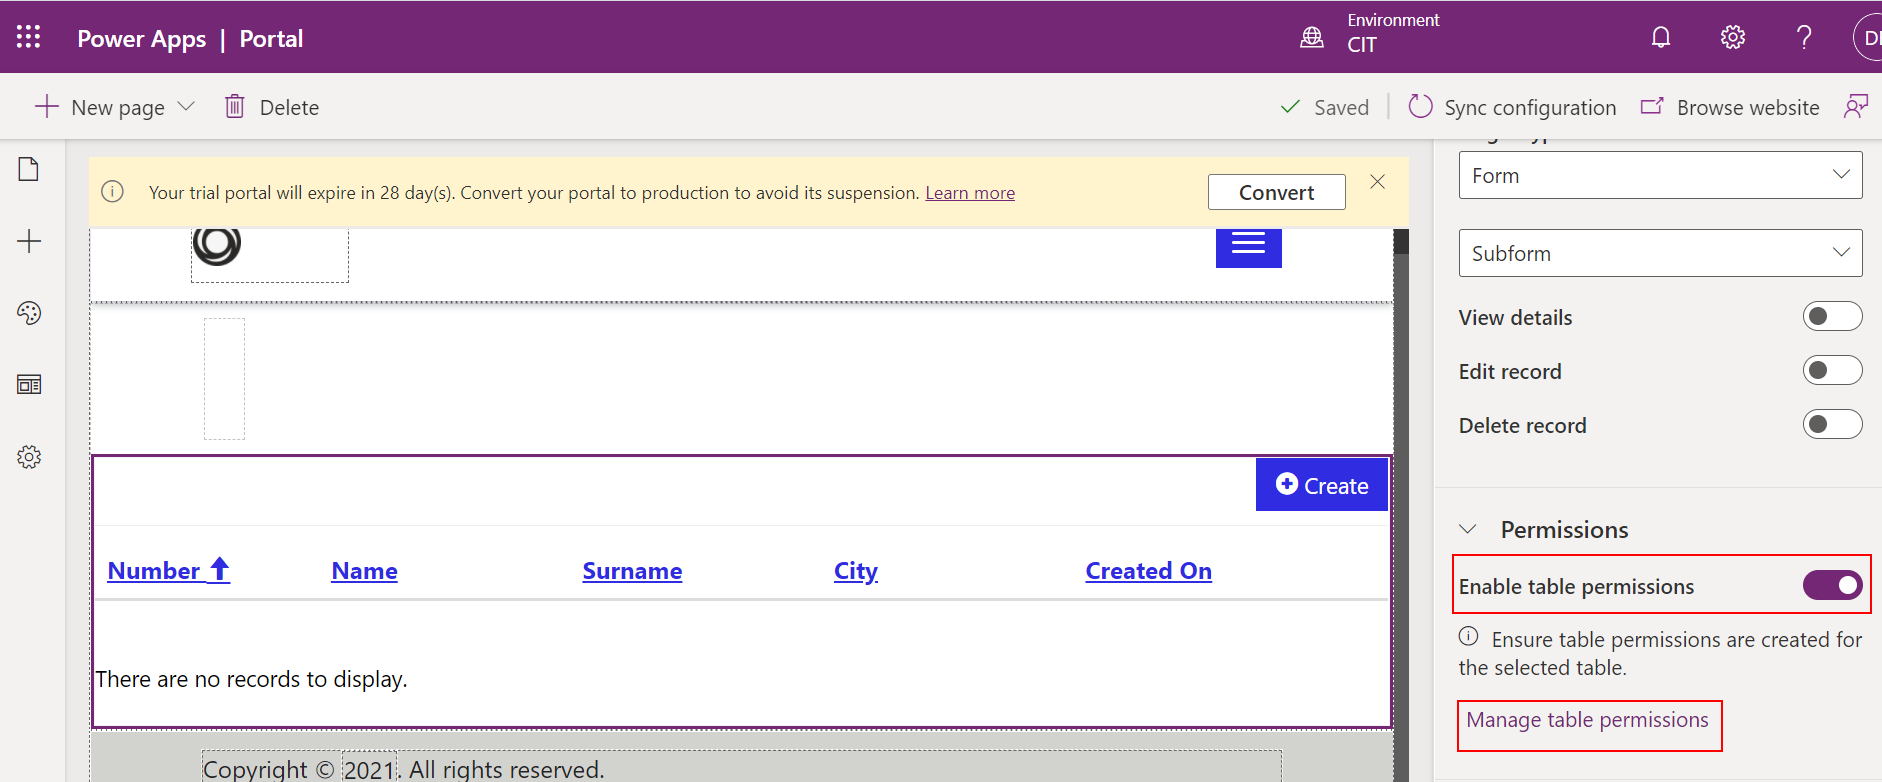
STEP 18: Once all the settings are selected, the fields in the table will be displayed as below
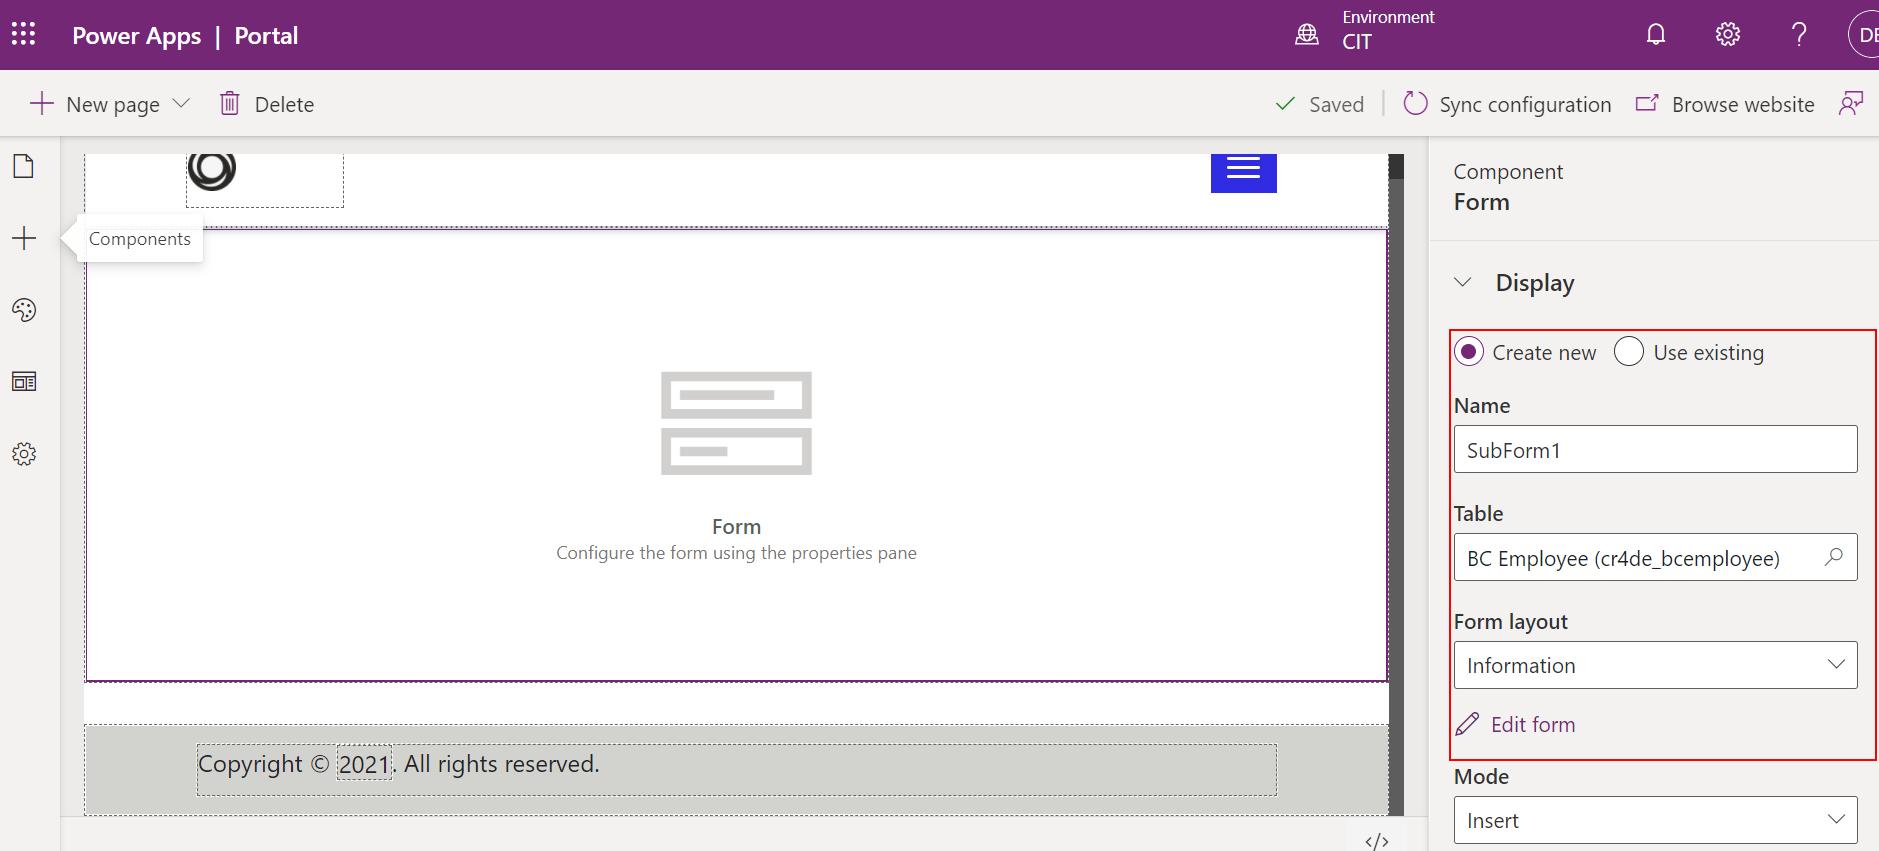
STEP 19: To enter the employee records in the portal, a subform has to be created. Click on + to create a new page and select form as the component
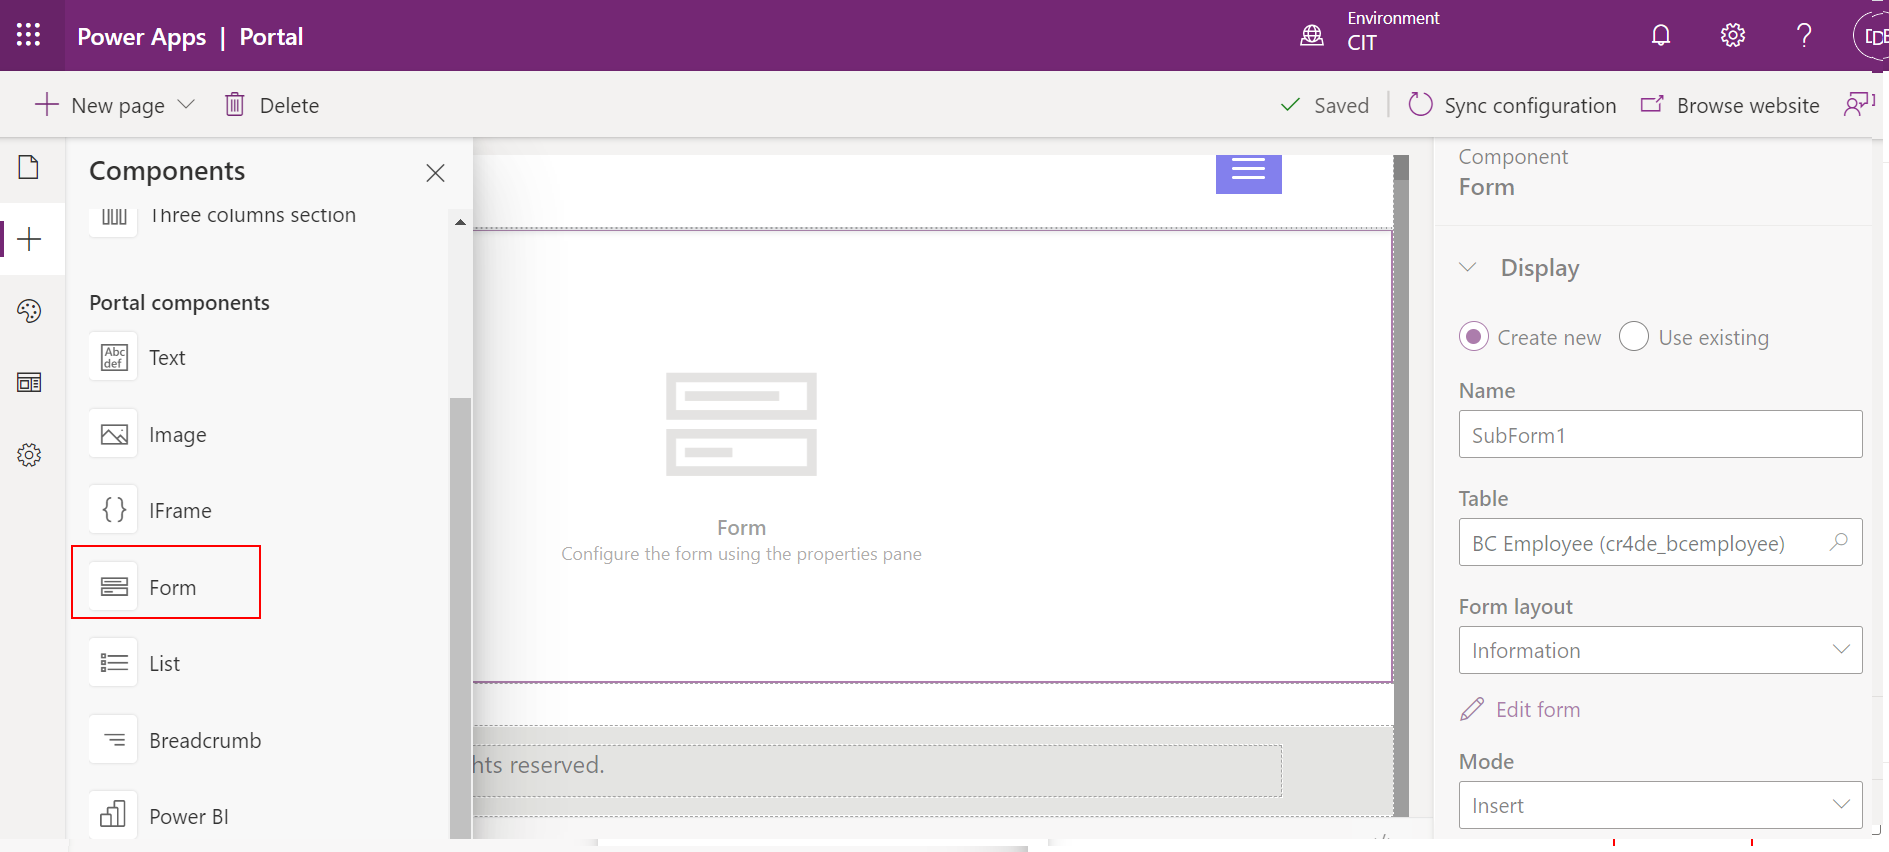
STEP 20: Click create new to develop a form for the portal. Provide the name and table details. In the form layout, choose information and click on the edit form. In the form settings, opt for the form field from the action ribbon
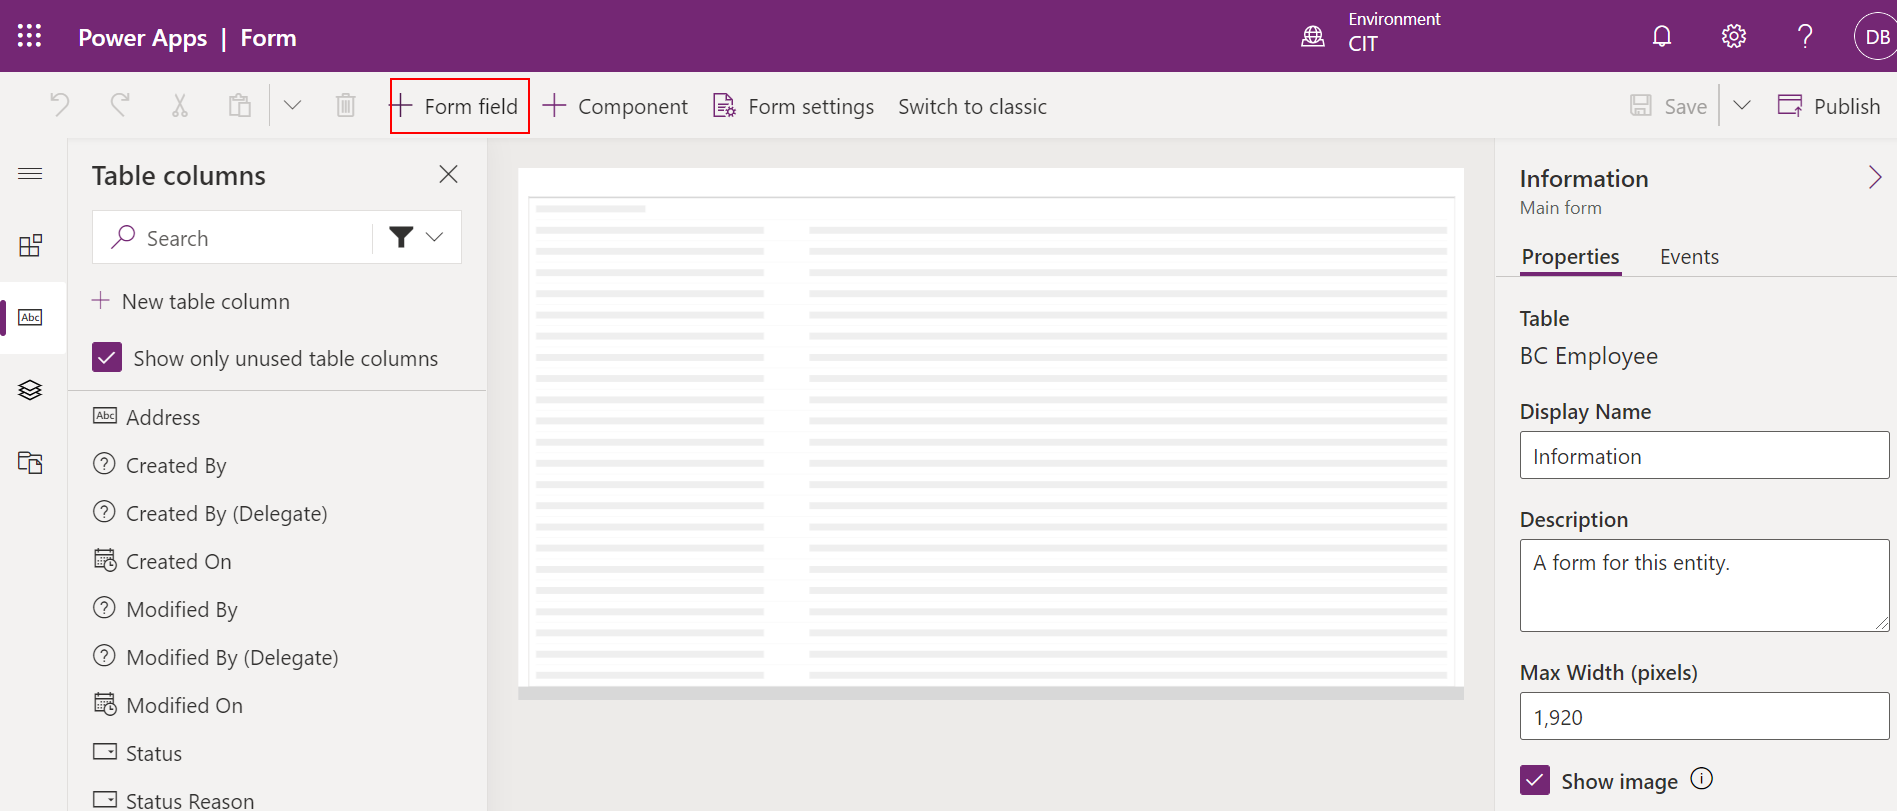
STEP 21: From the list of table fields, drag and drop the fields into the preview area. After choosing the required fields, click save and publish

STEP 22: Check the form name (display name) provided in the form settings and target type in the portal page are the same
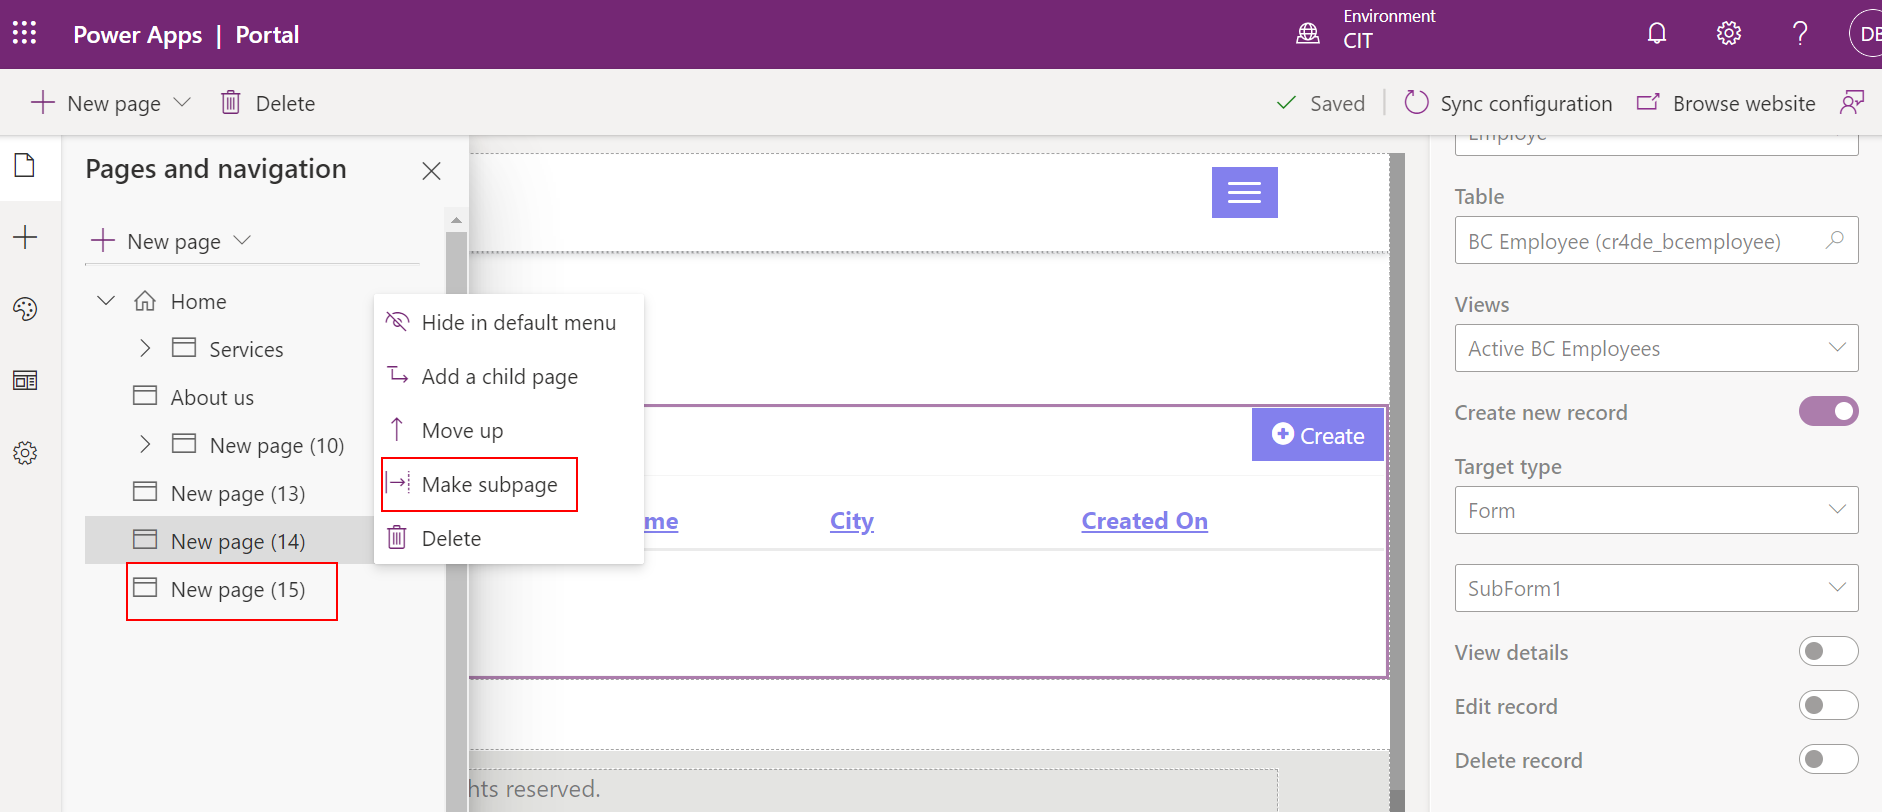
STEP 23: On successful creation of the subform, select pages and navigation in the left pane. Right click on subform and select make a subpage
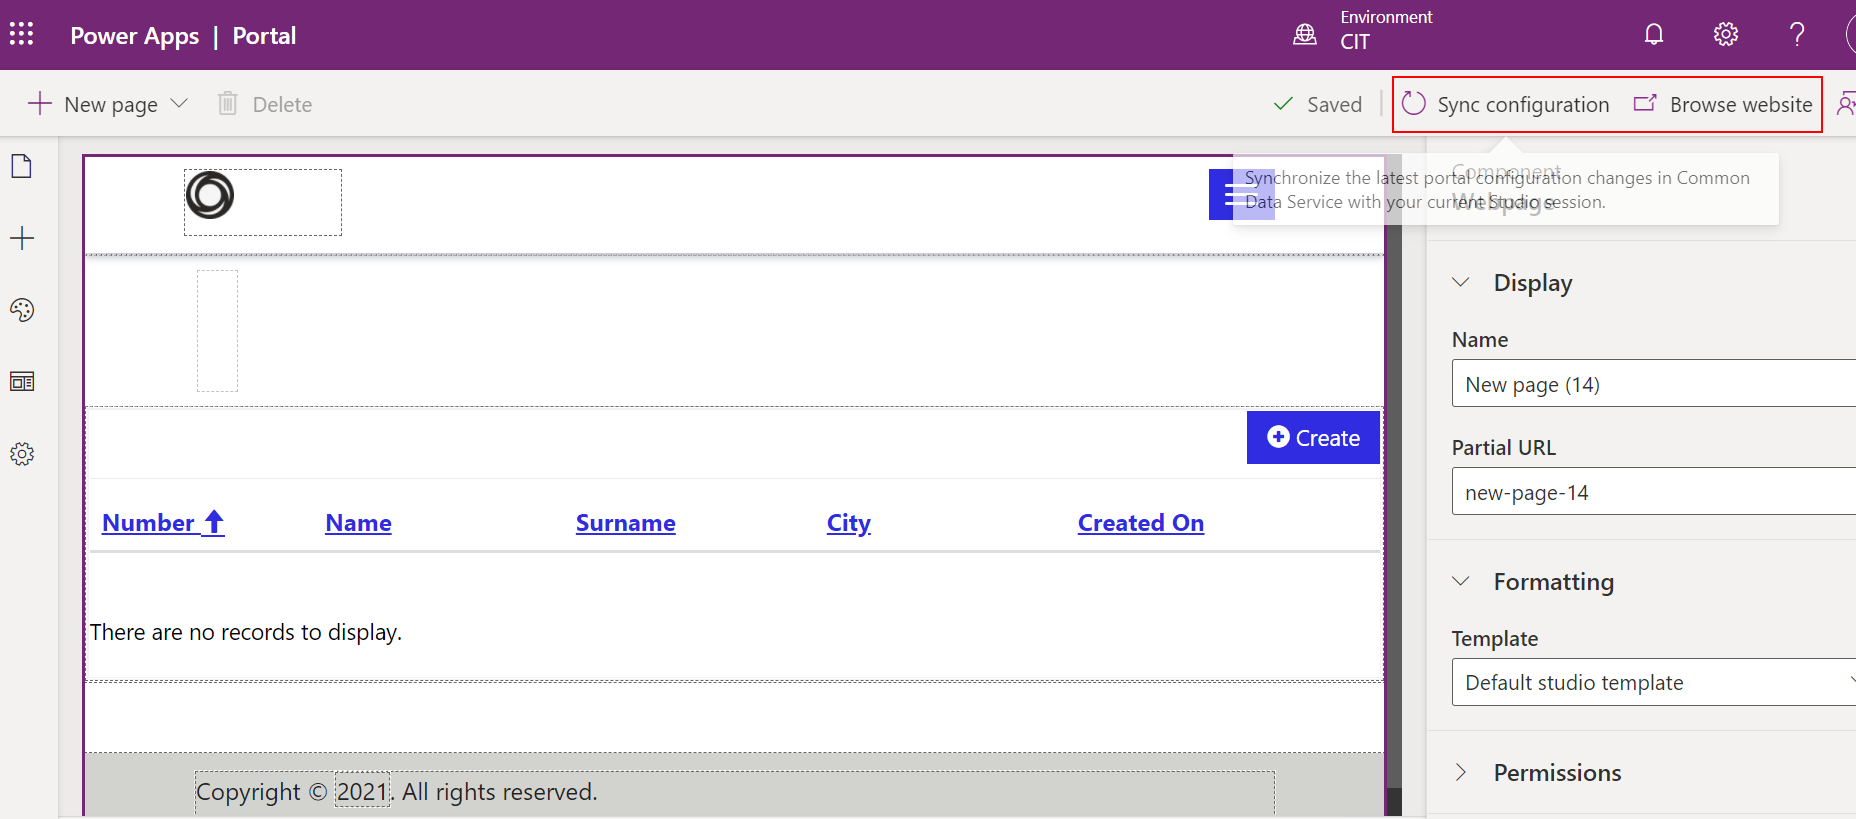
STEP 24: On creating the portal pages, select sync configuration and click browse website
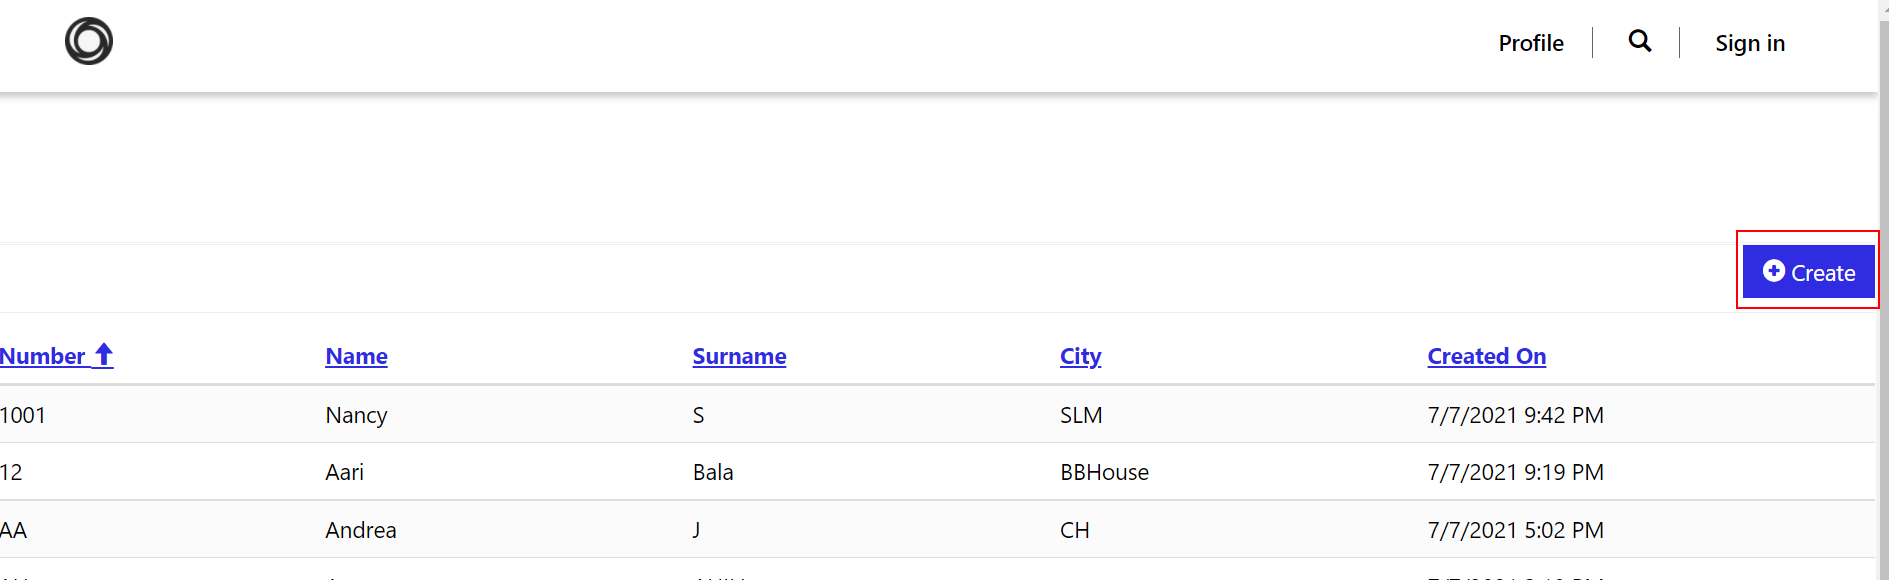
STEP 25: The portal can be viewed from a browser
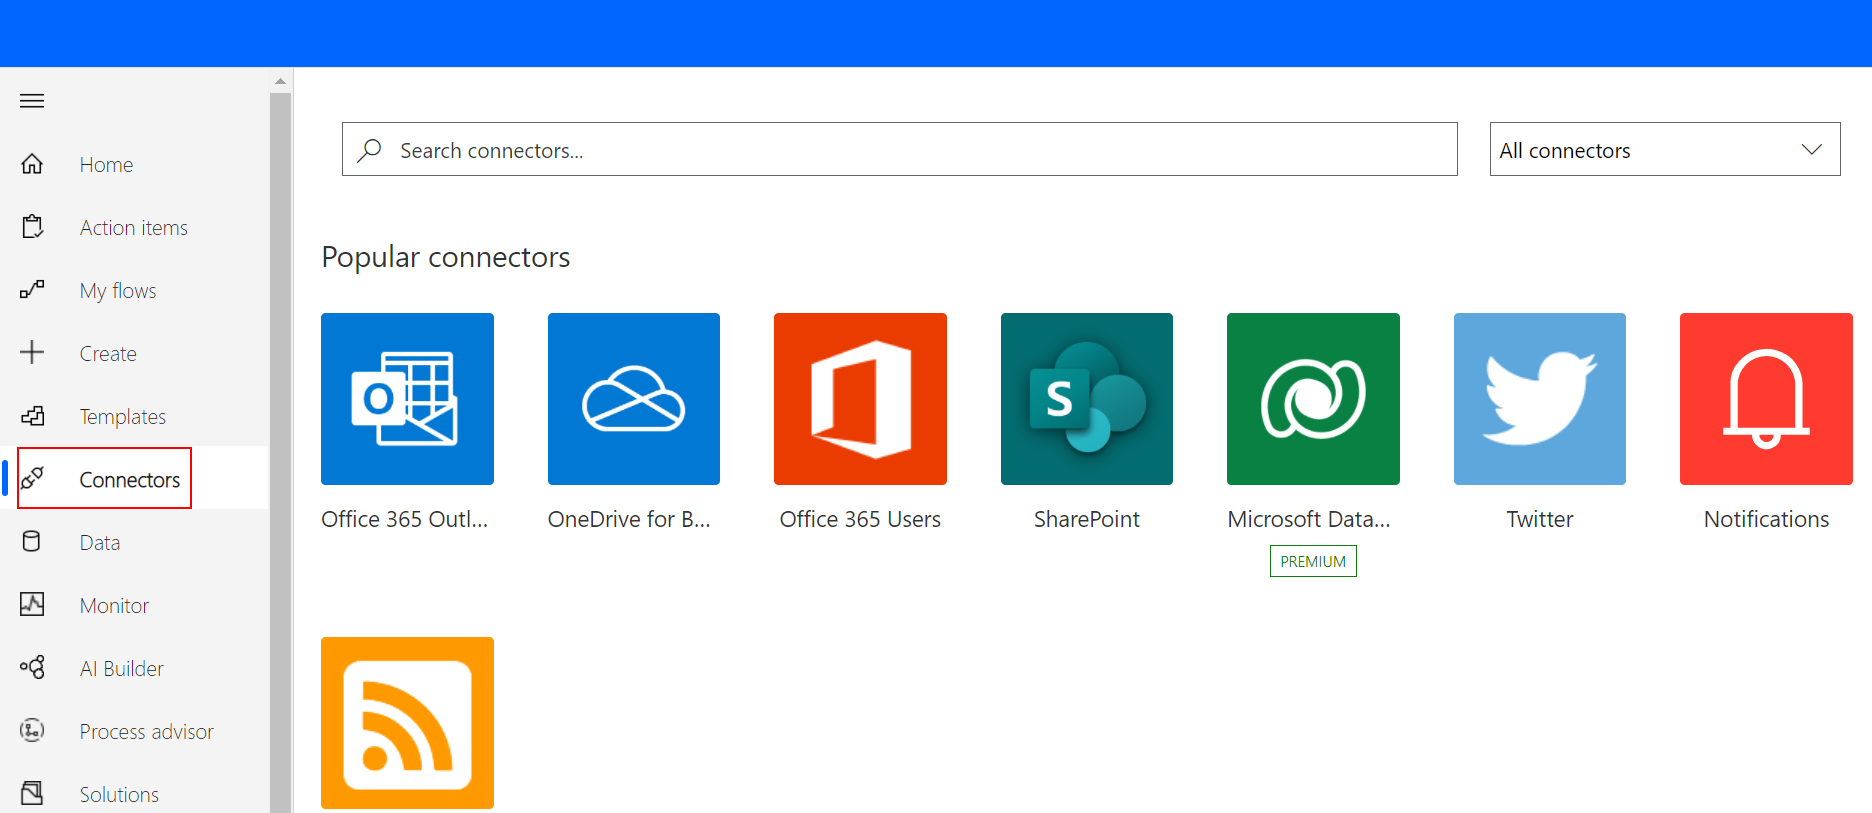
STEP 26: To automate the process from portal to Business central. Choose power automate. Click on connections from the action pane and search for Microsoft dataverse as the connector for portal
STEP 27: Create a flow to automate the process between the portal and Business central

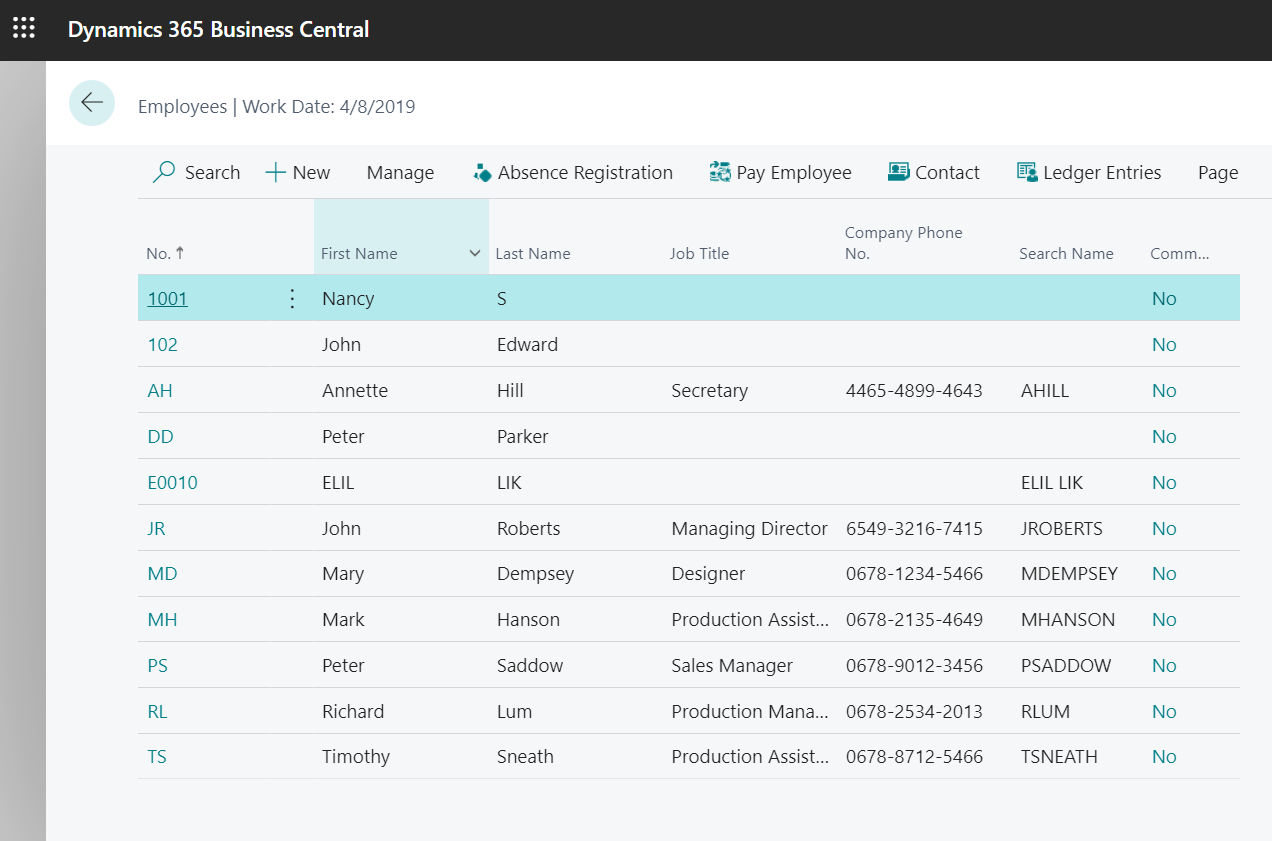
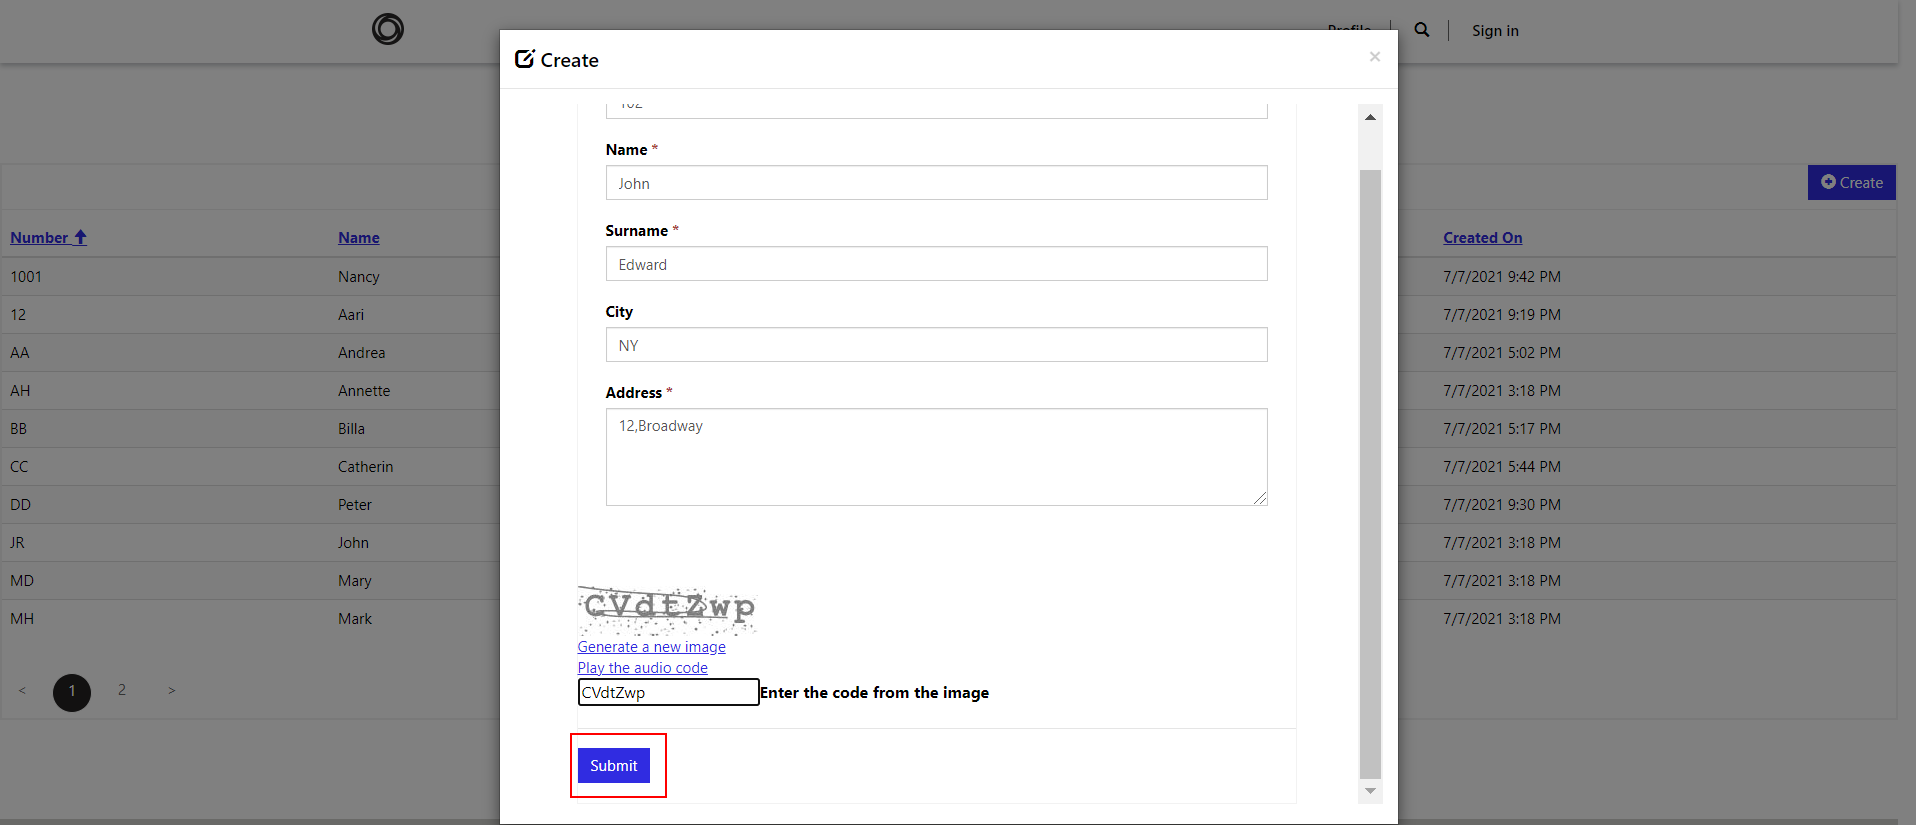
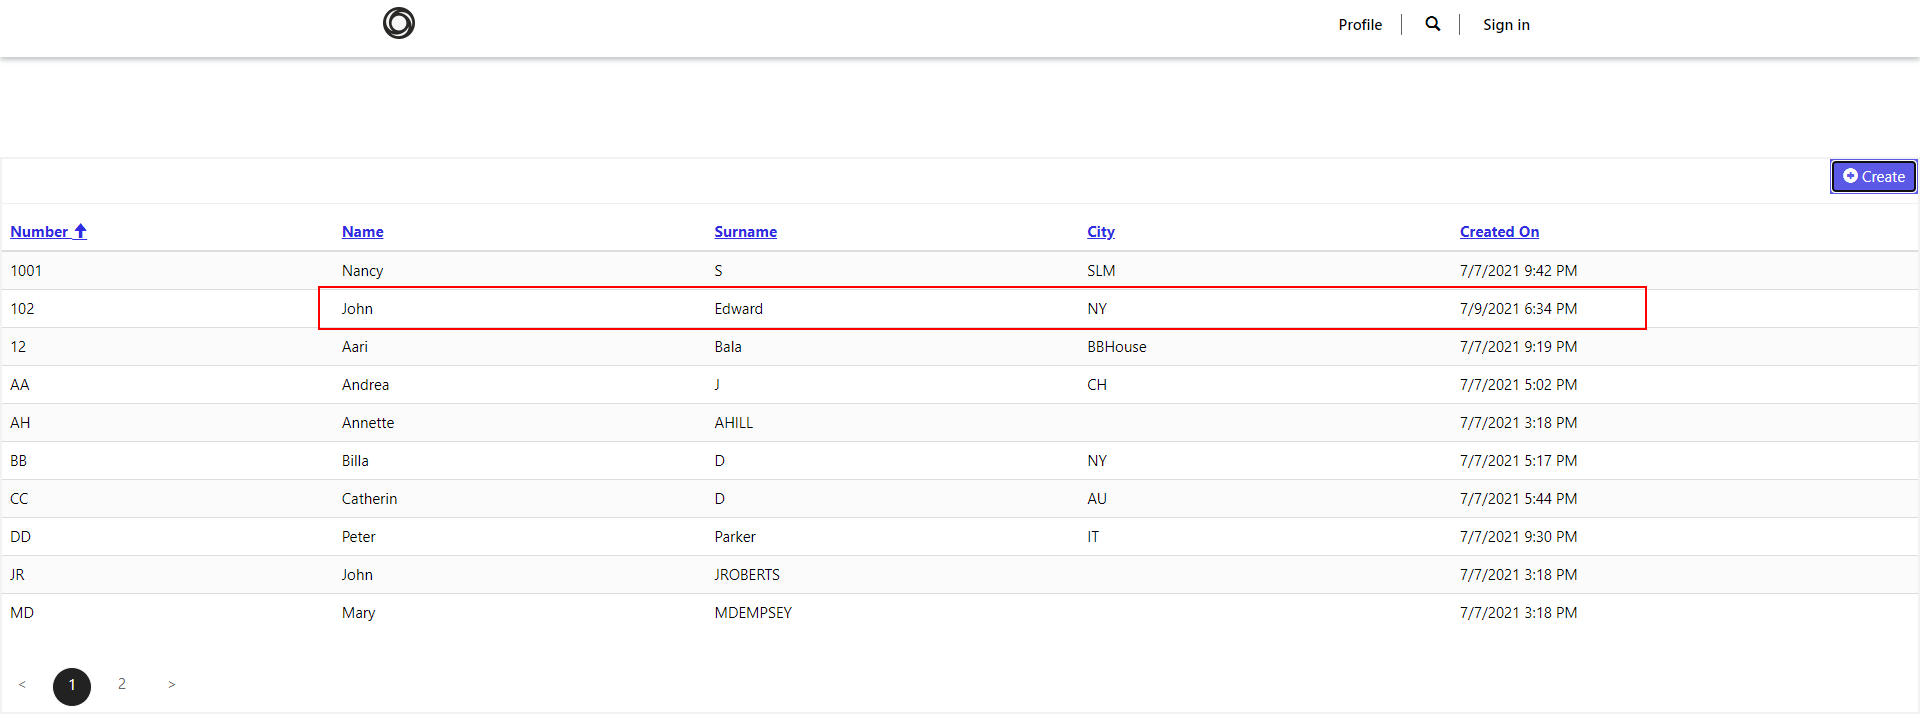
STEP 28: The screenshot below shows the list of employees that are created from the portal