Assigning the company as tenant in Dynamics 365 Business central On-premise
Published on July 30, 2021
Managing access and roles in Business Central on-premise involves understanding tenants and companies. Assigning a company as a tenant is a key administrative task, but it can be confusing. Learn the essential steps to ensure proper user access and data management with our expert advice.
Step 1: Open PowerShell in administrator mode and import the NAV admin tool to enable NAV commands in PowerShell
Set-ExecutionPolicy unrestricted -Force
Import-Module ‘C:\Program Files\Microsoft Dynamics 365 Business central \180\Service\ NavAdminTool.ps1’
Step 2: Import the module by using the command below in Power Shell
Import-Module ‘E:\Dynamics.365.BC.23795.US.DVD \WindowsPowerShellScripts \Multitenancy’ -Verbose
Step 3: Click the show command window and select the command How to move company to tenant
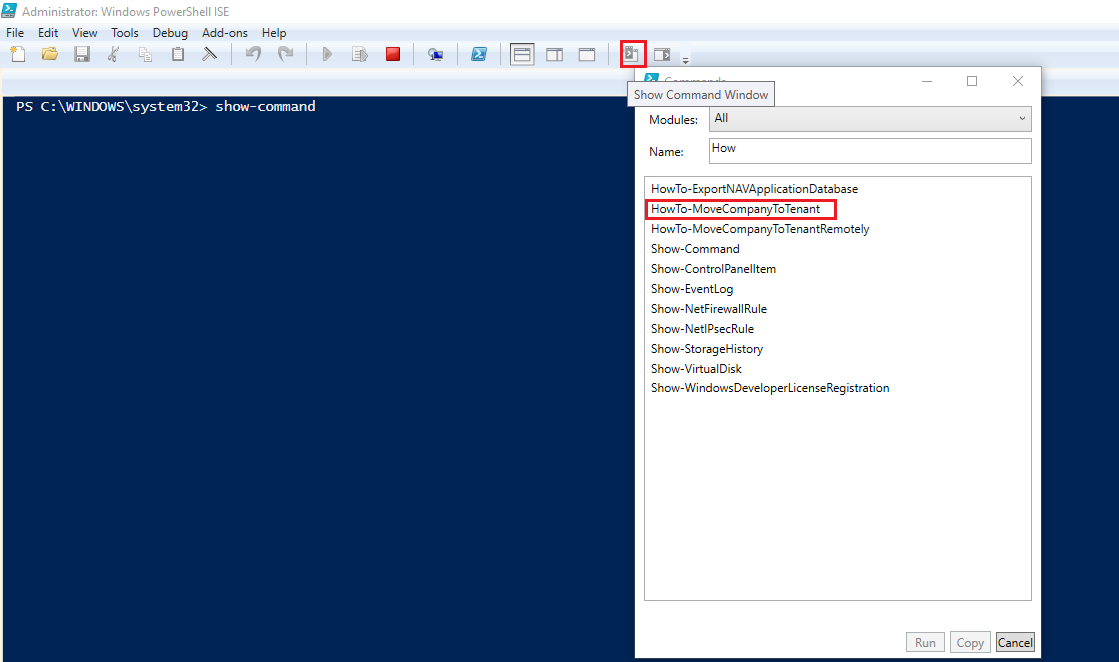
Specify the required fields and run the command
Company Name: Company that you want to move,
Database Name: Specify the Business database,
New Tenant Name: Specify the New tenant name,
Old Tenant Name: Specify the Old tenant name,
Server Instance Name,
Database Server

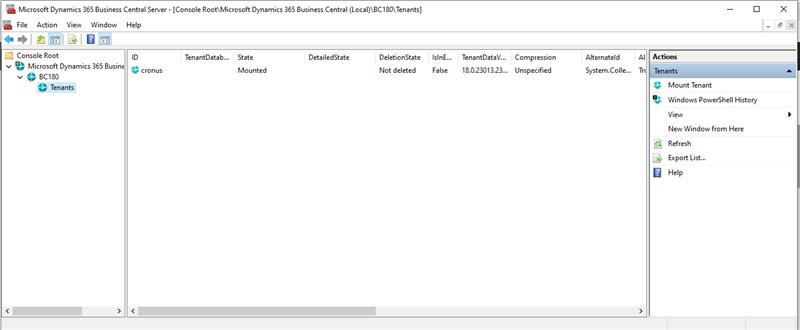
Note: When we execute the above command, a tenant will be assigned for the mentioned company i.e. the company will be moved to a separate business database and that business database will be allocated to the tenant.
Step 4: Check the SQL server. The new database ‘Cronus’ has been created. And you can see the tenant in Business central Administration tool
Contact us to know more about our Dynamics 365 Business Central services.